Dec
Peanut Butter Cranberry Dog Treats
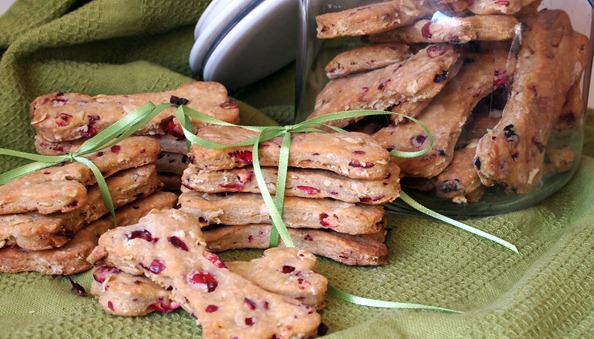
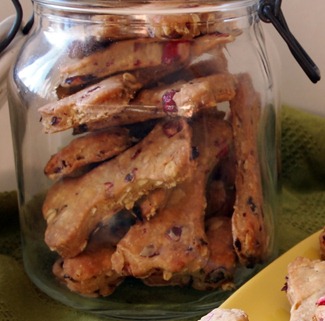
Yup, you read it right… dog treats. What? You don’t think dogs deserve homemade treats too? Well my dog definitely does. In fact, I think he expects them. Oh, you’re making cookies…are they for me? (You have to read this sentence in a dopy dog voice) Many years ago I used to make my own dog treats all the time. I made this really complicated recipe that included things like bone meal, protein powder and all sorts of other hard to find and expensive ingredients. Then I discovered Buddy Biscuits bake at home dog treats and all that difficult ingredient collecting went out the window. Buddy Biscuits are kind of like Betty Crocker brownie mix for dogs- except they use really healthy ingredients- and the box comes with a dog bone shaped cookie cutter! 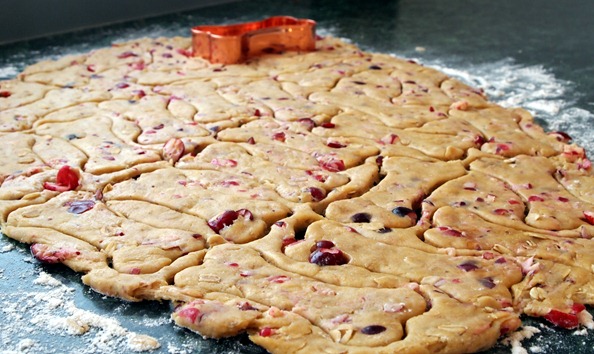
I got of out of the habit of making them though, and it’s probably been at least 3 years since I made any sort of homemade dog treat. Well, lucky for my dog about a month ago I stumbled upon this recipe for Cranberry Oat Dog Treats and decided that it was time to give them another try. Since I already had quite a few baking projects this week, and I’ve been a a roll with the human treats, it seemed only fitting that I should expand my baking repertoire to include something special for my canine friends.
This is Phineas waiting patiently for his treat
And here he is eating his treat – he’s very gentle for such a big guy
I didn’t end up following the recipe that I had discovered exactly, in fact I didn’t really follow it at all. Instead I found another recipe from this website that was similar except that it included peanut butter. I ended up with a kind of combination of the two recipes using peanut butter and cranberries. I had my heart set on including the cranberries because I really liked the way they made the treats look. Also, dogs need antioxidants too- right?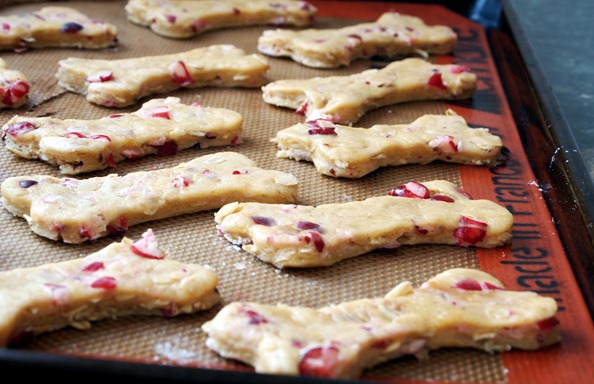
 I’ll be back in a few days
with more treats for
humans but until then
give your dog some
love and make it a
special homemade
holiday this year.
Oh, and one final note- a certain non-canine member of my household thought these looked good enough to eat. The verdict? Dry and bland…very dry and bland. For dogs only!
Peanut Butter Cranberry Dog Treats
Inspired by Doggie Dessert Chef and Bullwinkle.com
Makes: about 3 dozen 2-inch cookies
1/2 cup water
1/2 cup canola oil
2 eggs
3 tablespoons peanut butter
2 teaspoons vanilla extract
1 cup fresh cranberries, roughly chopped
2 cups all-purpose flour
1/2 cup oats
1/2 cup cornmeal
1. Preheat the oven to 400ºF.
2. In a medium bowl combine the water, canola oil, eggs, peanut butter and vanilla. Set aside.
3. In a large bowl whisk together the flour, oats and cornmeal. Make a well in the center of the flour mixture and pour in the wet ingredients. Stir well to combine. Fold in the chopped cranberries.
4. On a well floured surface roll the dough out to about a 1/3 of an inch thickness. Using your dog’s favorite cookie cutter shape, cut out the treats and transfer to a baking sheet.
5. Bake for 20 minutes. Turn off the oven and leave the treats in there, allowing them to cool and crisp. Store in an airtight container.
Oct
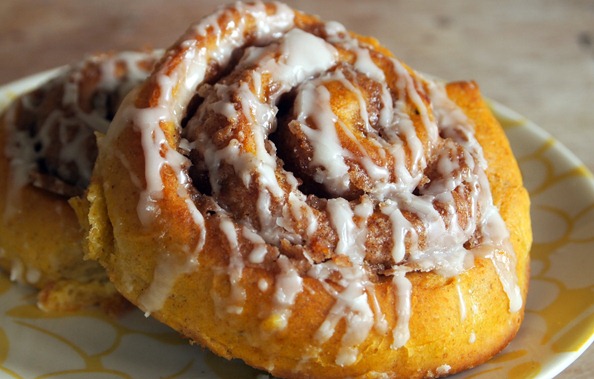
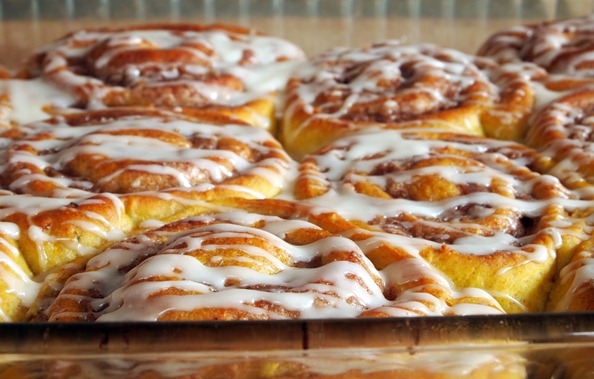
Roasted Squash Cinnamon Rolls
As promised, the squash journey continues. This week I have taken on the ominous Blue Hubbard Squash. This beastly, bumpy, blue –tinted behemoth can be a bit intimidating because of its size. However, once you get past the monstrosity factor and figure out how to crack this baby open, the reward is a sweet, smooth dark yellow flesh that is oh so yummy.
I have been making this recipe, formerly called “Pumpkin Cinnamon Rolls” for years. While they were good, some would even say delicious, I decided to mix it up a bit this year and substitute squash for the pumpkin. I’ve heard that the Hubbard squash is a great alternative to pumpkin because while it has a similar flavor the consistency is far smoother. Anyone who has even cooked a pumpkin and tried to mash it knows just how stringy it can be. Don’t get me wrong, I still think that pumpkin is great for cooking, and I will definitely be posting a pumpkin recipe or two sometime soon, but in this recipe the Hubbard squash simply blew the pumpkin away. 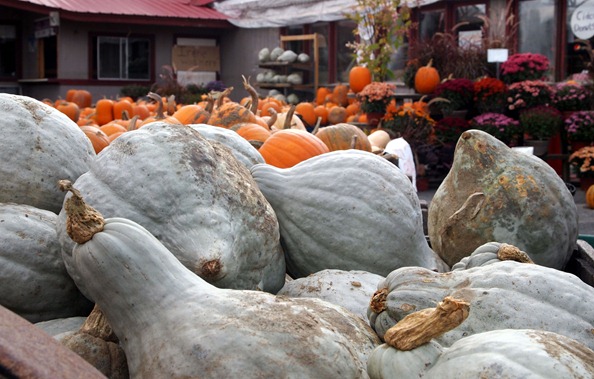
Before we start in on the recipe I feel obligated to give a bit of a disclaimer here. This is a long post…and this is a time consuming recipe. Stick with me though, because in the end when you are rewarded with the soft, pillowy squash-filled dough oozing with an ohhhy, gooey, cinnamony filling you simply won’t care that you spent an entire afternoon making them. Besides, if you go all out like I did and roast up an entire 11-pound squash, as a bonus you will have delicious leftover roasted squash that you can turn into a whole bunch of other recipes! 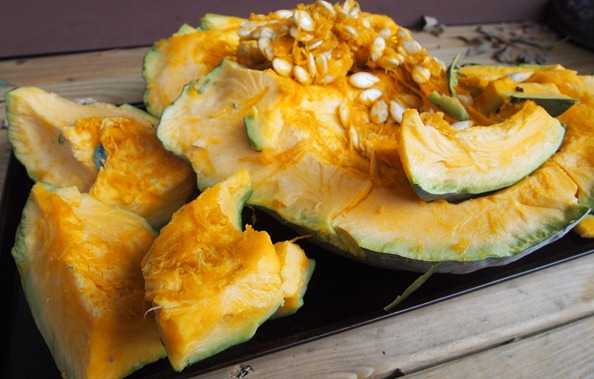
I am getting a bit ahead of myself though. The first step to cooking with a Blue Hubbard is to get that thing open. Despite their beastly reputation, a Hubbard does not have to be..well, a beast. This recipe only calls for one cup of squash so if you want to make your life easier go ahead and get the smallest one you can find. I even saw a variety called Baby Hubbard while I was at the farm stand. Most of those probably only weighed a very manageable 3-4 pounds. However, if you are a squash lover like me, or just feeling adventurous, go for it and get the big one! The leftover squash can be used in so many ways. And besides, wrestling with this beast was kind of fun. I decided to use the time honored tradition of dropping the squash on the ground to crack it open. I put it in a plastic bag, lifted it above my head, and let it fall (I did this outside on the deck because we have ceramic tile in our kitchen and I was afraid I might crack it ). Sure enough, after one fall the squash split in two. They were still two pretty big pieces though so I threw it down again and this time it broke into a bunch of manageable size parts. The next steps were simple- scrape out the seeds, peel off the skin, cut into roughly 1-inch size chunks and roast in a 375° for about 40 minutes or until tender. 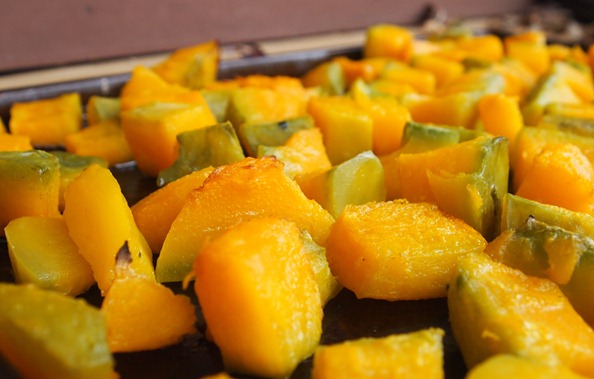 Once your squash is roasted to perfection, you can use a potato masher or food processor to turn it into a smooth purée. Set aside one cup of the mashed squash for the cinnamon roll recipe. If you went whole hog, or rather whole squash, and got yourself a big boy here are a few ideas for how to use your leftover squash:
- Mash it up, add a bit of cream or milk, throw in some spices (rosemary, cayenne pepper, or sage would all be good ) and you have a soup.
- Use the roasted cubes in a chicken pot pie!
- Add the puréed squash to mashed potatoes for an autumn twist on a classic favorite.
- Substitute the roasted Hubbard for Butternut in this recipe for squash Mac n’ Cheese http://www.myrecipes.com/recipe/creamy-light-macaroni-cheese-50400000115195/ (Omit step number two).
- Mix the roasted cubes with wild rice, caramelized onions and a bit of sausage for a super quick meal.
- Make a squash pizza! Roasted squash makes an amazing pizza topping. Use a base of ricotta cheese, garlic and a bit of mozzarella. Top with squash, sautéed shallots and a bit of crispy bacon or pancetta.
- Package the leftover squash in freezer bags and save for later.
There’s so much more you could do with the leftover roasted squash, but for now let’s get busy and make these rolls! 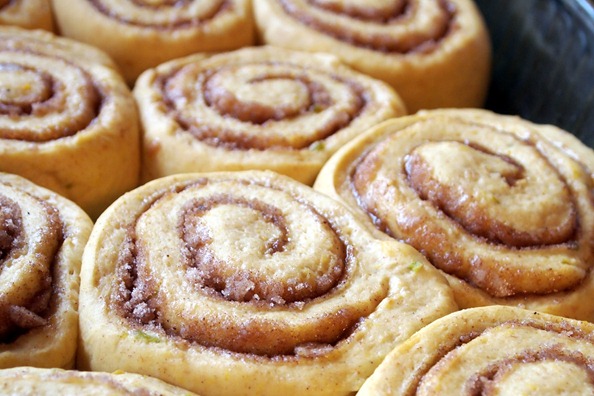
Makes 12-15 rolls
For the rolls:
1 package dry yeast (2 1/4 teaspoons)
1/4 cup warm water (100-110 degrees)
1 cup whole wheat flour
2 1/2 cups white flour
1 cup roasted Hubbard squash purée (fresh or canned pumpkin purée can be substituted, but I am telling you, the squash is the way to go)
1/2 cup 1% low-fat milk
5 tablespoons unsalted butter, melted
2 tablespoons granulated sugar
1 teaspoon salt
1 teaspoon cinnamon
¼ teaspoon cardamom
¼ teaspoon ginger
Filling:
4 tablespoons softened butter
2/3 cup sugar
1/4 cup brown sugar
3 tablespoons white flour
2 teaspoons cinnamon
1/2 teaspoon allspice
1/2 teaspoon ginger
1/4 teaspoon freshly grated nutmeg
1/8 teaspoon cloves
Glaze:
3/4 cup powdered sugar
2 tablespoons milk
1/4 teaspoon vanilla
- In a large bowl dissolve the yeast in warm water. Let stand for about 5 minutes until foamy. If it does not foam, start over with new yeast. Trust me, this step is important – there is nothing worse than dough that doesn’t rise properly.
- Add the whole wheat flour, squash, milk, butter, sugar and spices. Beat with a mixer until well combined for about 2 minutes.
- Now, it’s time to knead the dough. I use the bread hook on my stand mixer and it takes about 6 minutes to incorporate in 2 cups of the white flour, adding it one half cup at a time. The final half cup I prefer to knead in by hand on a well floured surface. By the end the dough will be smooth and elastic.
- If you don’t have a stand mixer, or you just love kneading by hand, it will probably take you about 10 minutes. Turn the dough out on a well floured surface and add the remaining 2 1/2 cups of flour a half cup at a time, kneading well between additions.
- Place the dough in a well oiled bowl, cover with a dish towel and let rise in a warm spot until doubled in size, about 1 hour. If you have a cold house like I do it can be tricky to get dough to rise properly. One way to remedy this (besides moving to a warmer climate!) is to pre-heat your oven to 200°, turn it off and then put the bowl of dough in there. It works every time.
- You will know the dough is ready when you press down on it with your fingers and the indentation stays. Punch the dough down and let it rest for 5 minutes.
- In the meantime, make the filling. Combine the 2 sugars, flour and spices in a medium size bowl. Cut in the butter with a pastry blender or 2 knives until it resembles a coarse meal.
- Flour a smooth surface and roll the dough out into a 12 x 18- inch rectangle. Sprinkle the dough evenly with the filling. Starting from the long edge, roll the dough tightly, pressing firmly to eliminate any air pockets. Pinch the seams and ends to seal.
- Cut the roll in 1-inch slices. You should end up with between 12 and 15 rolls. Place the rolls in a greased 9 x 11-inch baking pan, leaving room for them to rise. If they won’t all fit in the 9 x 11 pan use a 9-inch round cake pan or something similar for the extra rolls.
- Cover the dish(es) and let rise for about 30-40 minutes or until doubled in size once again. While they are rising pre-heat your oven to 375º.
- Bake for 20-25 minutes or until golden brown.
- Cool the rolls in the baking dish(es) on a metal rack. While they’re cooling, make the glaze. Whisk the powdered sugar, milk, and vanilla in a bowl until smooth. Drizzle the glaze over the cinnamon buns. Eat and enjoy!

