Mar
Sweet Potato, Smoked Mozzarella + Kale Grilled Pizza
Things have been kind of wacky around here lately. Wacky as in it’s March 20th and the temperature is supposed to reach 80 degrees today…and tomorrow…and the next day! We’ve been experiencing out of the ordinary weather all winter, but in the last week things suddenly changed from slightly warmer and dryer than average to weather that here in Vermont doesn’t usually happen until June- if we’re lucky. This past Sunday a record was broken in Burlington for the highest temperature ever recorded- 79 degrees. The previous record was 66 degrees. That’s 13 degrees warmer! (yes, I know you can do math but I just had to point out the enormous jump in temps) Chances are that these beautiful summer days in the middle of March won’t last much longer. Next week the temperatures will probably drop back down to normal, and in all likelihood it will snow at least one more time before winter is truly over. For now though, there’s nothing to do but enjoy the gift that we’ve been given. Spending time sitting on the porch, raking the yard, walking the dog in a t-shirt, sleeping with the window open, breaking out my flip flops and of course, one of my favorite summer activities…grilling!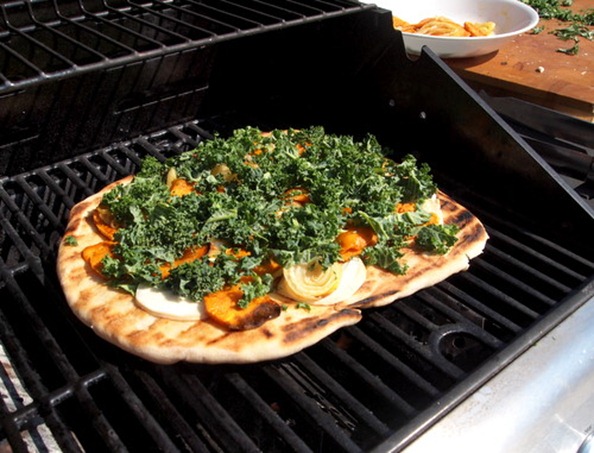
I like to grill everything, and I do. Meats, vegetables, shish kabobs, sandwiches, pizzas…you name it and I will grill it. I know, I know, a women (gasp) who like to grill. For some strange reason grilling is often considered a man’s job. Does anyone else think this is weird, and kind of wrong? There are men who couldn’t make a pot of pasta to save their lives yet give them a slab of meat and a hot grill and they will cook it up like they’re the head chef at a 5 star restaurant. And there are women who can whip up anything in the kitchen but wouldn’t dream of firing up the grill. What’s up with that? If I’m being honest it’s the latter that annoys me the most. What are you too lady-like for the grill? Is it too dirty for you? Are you scared of the fire? I just don’t get it. I’m proud to admit that in this household my husband it secure enough in his manliness to leave the grilling to me. And I in turn am confident enough in my feminine side to know I can use the grill, and use it well. So come on ladies, it’s time to get grilling!
On to the recipe. The key to a successful grilled pizza is having all the ingredients ready to go before you even turn the grill on. This of course includes the dough if you are making it yourself, but also any toppings that may need to be cooked.
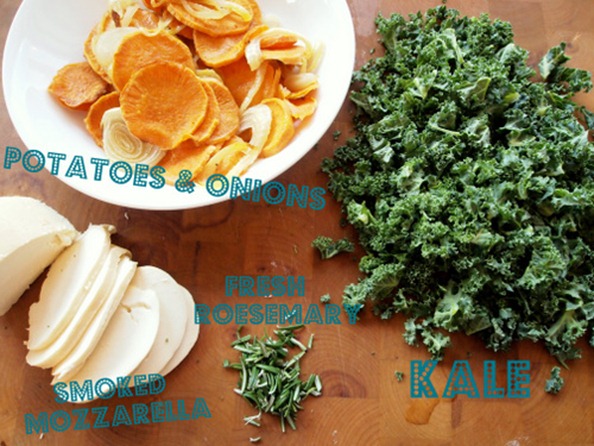
Grilled pizza happens very fast and the topping are really only on the grill long enough to melt the cheese so anything you don’t want to eat raw needs a quick cook before hand. For this pizza I went with a kind of wintery mix of sweet potatoes, onions, kale and a smoky fresh mozzarella. This is my nod to the fact that it still is only March and things like fresh tomatoes and basil are still very far away from being in season. The sweet potatoes and onions are tossed with a little olive oil, salt and fresh pepper before they are briefly roasted in the oven. If you have a good grill basket you can do this step on the grill. I chose not to because I wanted the potatoes sliced thin and I have a bad habit of burning them on the grill when they are cut this thin. 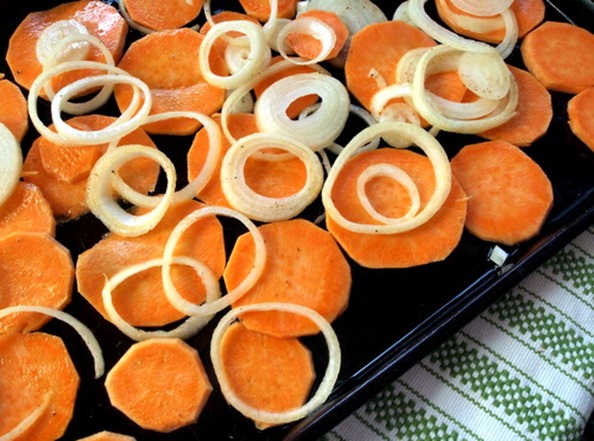
Another tip for grilled pizza is to keep it small. Don’t try to make a huge pizza that takes up the entire grill because when it comes time to flip it things will get tricky real fast. Also, you want one side of the grill searing hot so you can achieve a crispy grilled crust and the other side low heat for melting the cheese. If your pizza is too big you won’t be able to slide the cooked crust over to the cool side for cheese melting. The result will be a burnt crust and cold cheese. If you can’t tell, this has happened to me more than once. Now I always make two small pizzas and cook the second crust while the first one is on the cheese melting side. Oh, one last tip- grilled pizza doesn’t have to be round. The best shape is the one that fits your grill best. For me that is a kind of rectangular oval with wavy edges. Here is small pizza number one. Se how the crust is starting to bubble in the middle- yummm!
And here it is flipped over and cooking on the second side. Look at those beautiful grill marks.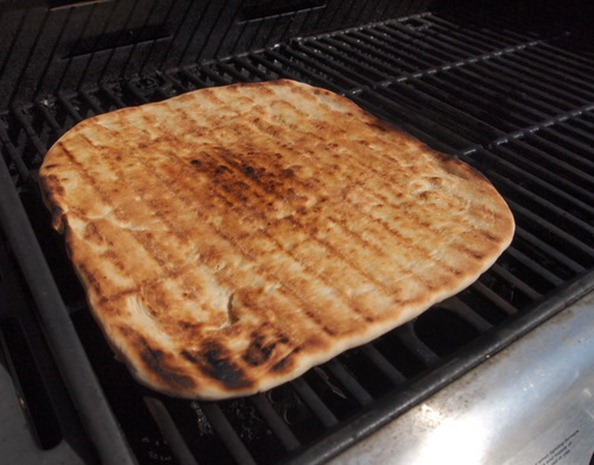
Now I slide it over to the cool side and load up the toppings, close the lid to let the cheese melt.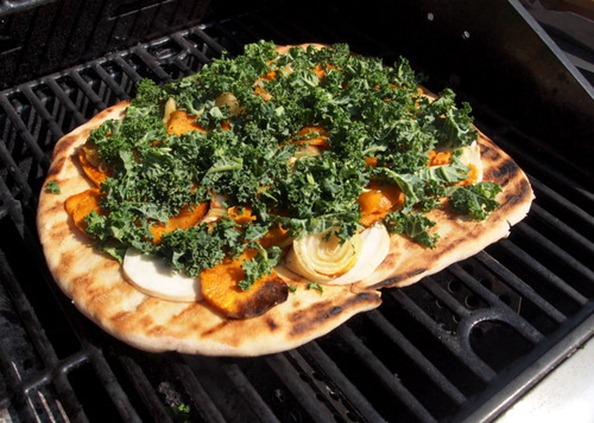
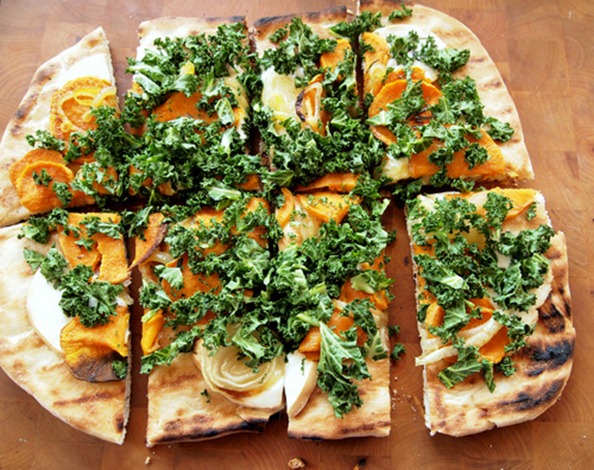
The finished product. Crisp crust, melted smoky cheese, roasted sweets and onions, and crunchy kale with just a sprinkle of fresh rosemary. Now this is how a real woman uses a grill.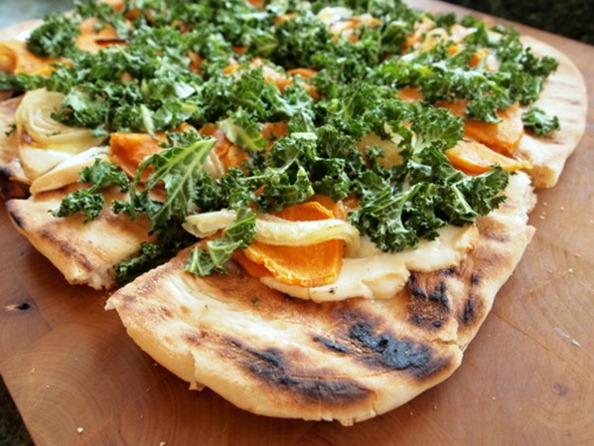
Sweet Potato, Smoked Mozzarella + Kale Grilled Pizza
inspired by Two Peas & Their Pod
For the crust (or you can buy premade dough)
1 cup warm (not hot)m water
2 cups bread flour
1 cup whole wheat flour
1 package yeast
1/2 tablespoon honey or sugar
2 tablespoon olive oil
1 teaspoon salt
Toppings
1 large sweet potato, peeled and sliced thin
1 medium yellow onion, sliced thin
salt and freshly ground pepper
2-3 tablespoons olive oil, divided
2 cups kale, coarsely chopped
8 ounces fresh smoked mozzarella
1 tablespoon fresh rosemary
coarse salt
1. Make the crust. In a large bowl combine the warm water, yeast and honey or sugar. Whisk and set aside for 10 minutes or until foamy. Add the olive oil, salt and bread flour and stir with a wooden spoon until a dough forms. Place the dough onto a well floured surface and knead for about 10 minuets incorporating in the 1 cup of whole wheat flour a little at a time. The dough with be soft, elastic and slightly sticky. Put it in a bowl and brushed with a bit of oil and drizzle a little more on top. Cover with a clean dish towel and let rise until doubled in size, one to one and half hours.
*Make ahead tip: After the dough is done rising you can punch it down, divide it in 2, roll it into balls and refrigerate in a sealed plastic bag until the next day.
2. Prepare the toppings. Preheat the oven to 400ºF. Combine the sweet potato and onion on a large rimmed baking sheet. Drizzle with 1/2 tablespoon of olive oil and sprinkle with salt and a few grinds of pepper. Roast, stirring once halfway through for 20-25 minutes or until the potatoes are soft.
3. When the dough is done rising preheat the grill. If you have 4 burners turn 2 on medium high and 2 on low. If you have only 2 burners turn one on medium-high and one on low.
4. Punch down the dough and place it on the counter. Cut it in half and place one half back in the bowl covered by the towel so it doesn’t dry out. Take the other half and stretch it into the shape you desire (it’s best to make a shape that fits your grill). Thick or thin crust is up to you, but a thin crust will develop more bubbles and lovely charred grill marks. Place the dough on a baking sheet and repeat with the second half.
5. Before you start grilling the crust make sure everything you will need (toppings, olive oil, salt, tongs) are close by because once you start cooking there is little time to run back and forth to the kitchen. Brush the top of one crust with olive oil and place it oil side down on the hot side of the grill. The best method it to put one side down first and stretch the rest out over the grates. Don’t worry if it becomes misshapen. Believe me, your moth won’t mind. Let the crust cook for 2-4 minutes with the lid closed, occasionally lifting the dough with the tongs to check for burning.
6. When it looks nice and golden brown on the bottom brush the top with olive oil, sprinkle it with salt and flip it over. Place the toppings on the pizza and then slide over to the cooler side of the grill. About 2 minutes is all you need to cook the second side of the crust. If you think its will take you longer than that to arrange the toppings be sure to move it to the cooler side of the grill. Now you can place the second dough on the hot side of the grill and repeat the process. By the time the second pizza needs to move over to the cool side the first one will be ready to take off the grill. Slice and serve immediately.
Mar
Turkey Veggie Meatloaf with Caramelized Onions
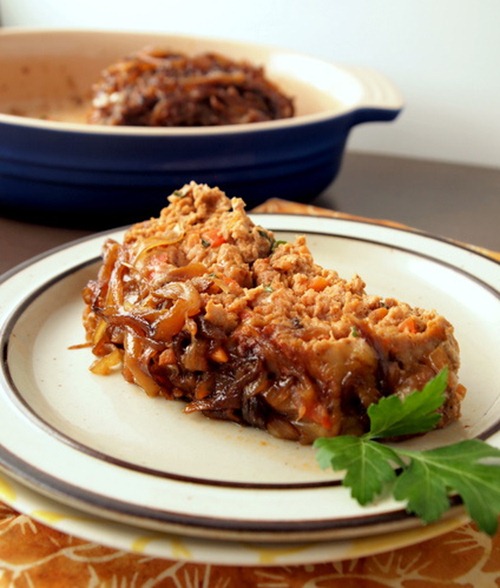 I happen to think that meatloaf is pretty high up there on the comfort food scale. It’s kind of like mac n’ cheese or mashed potatoes. When you eat it you just feel good. I’ll be the first to admit though that meatloaf can be…well…kind of boring. It’s one of those dishes that I would never order in a restaurant for fear that it might be tasteless, or dry, or just down right bad tasting. At home though, it’s a different story. I consider myself somewhat of a meatloaf aficionado and over the years I’ve perfected my meatloaf recipe to the point where I can now proudly declare this to be the Best Meatloaf Ever. I know it’s a bold claim to make, but I stand by it. What makes this meatloaf so special, besides the topping of gooey cheese and candy-sweet caramelized onions, is the addition of lots of veggies. Sounds weird right? I mean it’s called meatloaf, not vegetable loaf. Stick with me though- I promise this will be good. The veggies in the meatloaf serve three purposes. First, they add moisture, second they add flavor, and third they add the ever important healthy bits. The last part is especially important the next day when your eating a huge slab of meatloaf in between two pieces of thick bread…and oops now you’re too full for salad. No big deal- the veggies are already in the loaf!
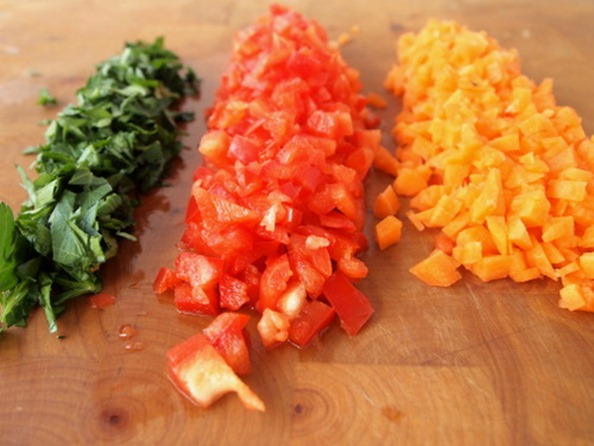
I’ve tried all sorts of different veggie combinations in my meatloaf. Zucchini, spinach, green beans, peas, corn, you name it, it’s gone in meatloaf. In the end I always come back to the simple pairing of carrot and sweet red pepper.This combo provides just the right amount of moisture and as a bonus it adds a nice punch of color to what would otherwise be just a boring brown loaf. I also add a bit of flat leaf parsley if I have it on hand because I like its mild peppery flavor…it also rounds out the color spectrum quite nicely. I used to cook the veggies before I added them to the meat, but over the years I’ve learned that if you chop them up fairly small (especially the carrots) and add them raw they will cook inside the loaf and infuse the meat with juicy vegetable goodness. 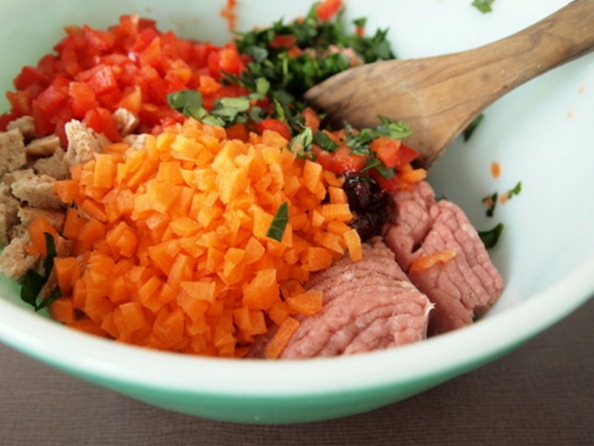
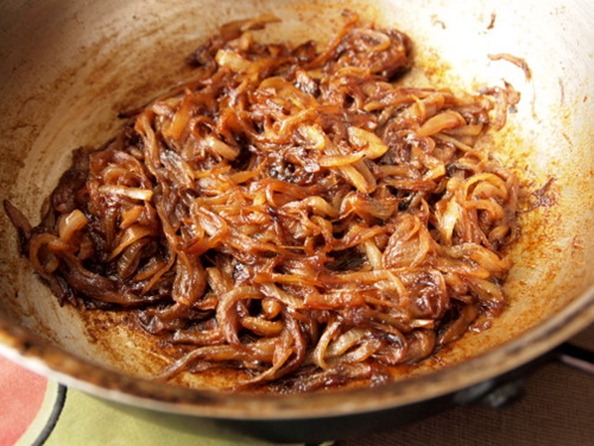
The other trick to a winning meatloaf- a free formed loaf. Traditionally meatloaf is cooked inside a bread loaf pan. While this method does yield a perfectly shaped loaf, it also means that you have to cook the meatloaf longer (increasing the chance it could dry out) and it eliminates the delicious extra “crust” that results from the free form method. I’ve found that if you cook your loaf in a baking pan just a bit bigger than loaf itself (about a 1-inch border of space around the edge) the air circulates around the meat allowing it to cook evenly and creating a tasty crisp exterior all around. 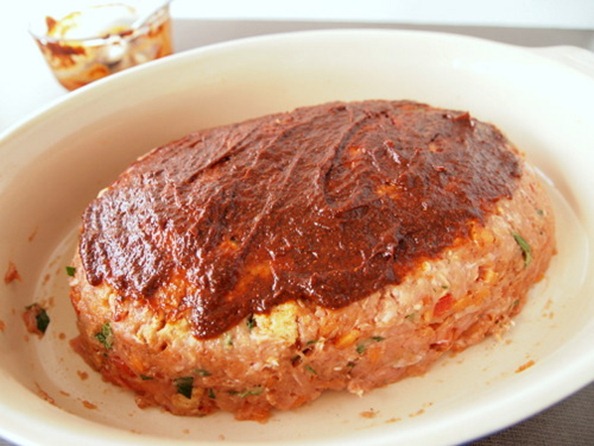 Now for the topping. This meatloaf is quite excellent on it’s own. It really doesn’t need a thick layer of melted cheese and sweet onions to be delicious. But let’s face it, good food is almost never about need and almost always about want. And you WANT these onions. If I had my way caramelized onions would be packaged and sold as candy. Sweet, oniony candy that I want to eat by the bowlful. Okay, that’s a little strange I admit, but what I’m trying to say is that even on their own caramelized onions rock and when combined with cheese and meatloaf…well words alone can’t describe the perfection of this combination. Yes, making the caramelized onions is an extra step- a 40 minutes extra step- but totally worth it. I promise.
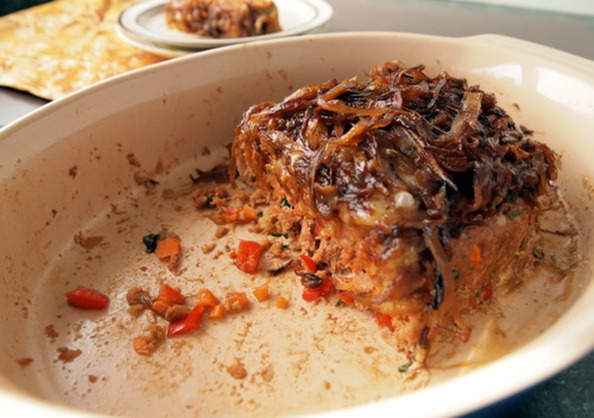
Turkey Veggie Meatloaf with Caramelized Onions
Serves: 8
1 1/2 pounds ground turkey
2 carrots, finely chopped
1/2 sweet red pepper, finely chopped
1/4 cup flat leaf parsley, finely chopped
1 egg, lightly beaten
1 slice soft whole wheat bread, crumbled
2 tablespoons ketchup
1 tablespoon chili powder
salt and pepper
3 tablespoons unsalted butter
2 medium yellow onions, thinly sliced
1 1/2 tablespoons brown sugar
1 tablespoon balsamic vinegar
3-4 ounces sharp cheddar cheese, sliced
1. Preheat the oven to 375ºF. Combine the turkey, carrots, red pepper, parsley, egg and bread in a medium bowl. In a small bowl mix together the ketchup and chili powder. Add half the ketchup-chili mixture to the meat. Season with a dash of salt and few grounds of pepper. Mixt well with a wooden spoon or your hands.
2. Form the meat mixture in a loaf shape and place in a baking pan only slightly larger than the loaf. You can smooth the edges with a spoon but don’t worry too much about making it perfect. Spread the remaining ketchup-chili sauce over the top of the loaf.
3. Bake for 40 minutes. Remove from the oven, lay the cheese slices over the top and pile on the caramelized onions (instructions below). Return to the oven for another 15 minutes. Let stand for about 10 minutes before serving.
4. The most efficient way to make this dish is to have the onions sliced and ready to go in the pan before you assemble the meatloaf. Don’t try to cook them while you are assembling the meatloaf though because they need frequent attention and if you’re anything like me two tasks at once is one too many. When the meatloaf goes in the oven melt the butter in a shallow pan over medium-high heat. Add the onions and cook, stirring often for about 10 minutes or until the onions begin to brown.
5. Turn the heat down to medium and continue to cook for another 20 minutes. Stir frequently, scraping the browned bits from the bottom of the pan. If it seems like the onions are burning turn the heat down. You can even add a tablespoon of water if you need to. The idea is to cook these onions slowly so they caramelize and not to brown them too quickly. After 20 minutes the onions should be complete wilted and have turned a deep golden brown. Now is when you add the brown sugar and balsamic vinegar. Stir well, turn the heat down a bit more and cook for another 10 minutes. Don’t forget to stir and scrape frequently. When the onions are done follow the instructions above to finish off the meatloaf.
Jan
Jamaican Patties
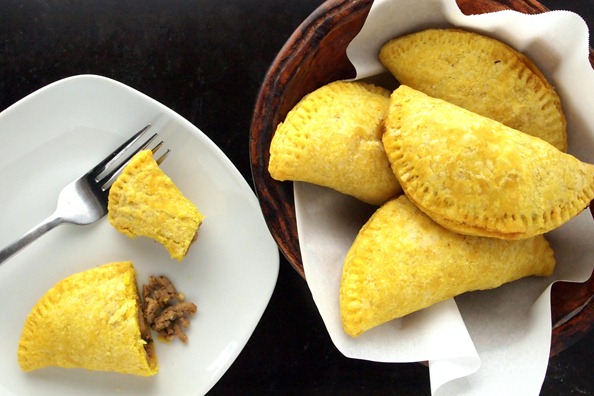
What’s the first thing that comes to mind when you think of Jamaica? Sandy beaches, turquoise water, tropical breezes? How about a game of classic American football? Yup, Football and Jamaica…all rolled up into one rocking culinary adventure that we are calling our Jamaican Super Bowl Extravaganza! That’s right, you heard me. This year we are having a Jamaican themed Super Bowl party. What do you eat at a Jamaican football party? How about spicy Jerk chicken, Jamaican potato salad, rice salad with pineapple, desserts with coconut and tropical fruit, spicy avocado dip, exotic rum drinks, and of course- these tender, flaky meat filled patties.
 So how did we get here? What brought about this sudden desire to combine America’s most beloved mid-winter excuse to get drunk on a Sunday with the cuisine of a country where football is actully soccer and is played on the beach? Well, let’s start at the beginning. Once there was a girl who met a guy from a far off land…okay maybe we won’t start that far back, I am trying to share a recipe with you, not write a fairy tale. The short version is that I have a good friend (Heather) who married a guy from Jamaica (Gary). In addition to much love and happiness, Gary also brought his passion for Jamaican cuisine into Heather’s life. Heather in turn has shared these dishes, and many of the recipes, with us- her very lucky friends (when you have a friend who shows up at your potluck with a HUGE platter of spicy jerk chicken you know you have a good thing going)! About a month ago we were sitting around with some friends and the conversation somehow turned to Jamaica and then inevitably, to the food of Jamaica, when someone (most likely me) said, “Hey, we should have a Jamaican themed potluck!” Since we were already planning on having everyone in the room over for the Super Bowl, it only made sense to combine the two together. This is how the Jamaican football extravaganza was born.
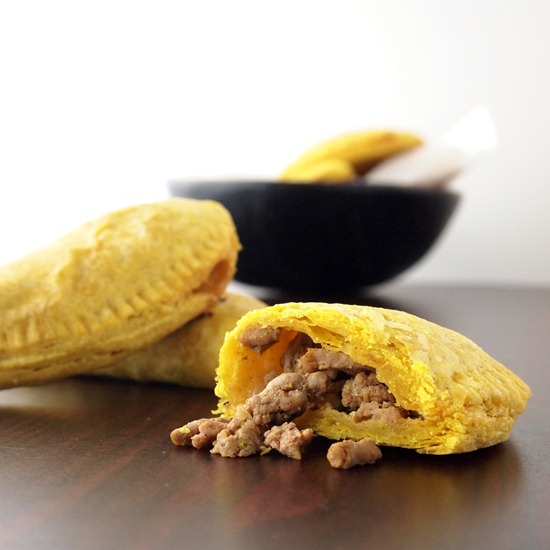
 I knew right away that I wanted to make these patties. Once, many years ago, I was lucky enough to visit Jamaica. In addition to the beautiful scenery, warm weather and friendly people, one of the highlights of this trip was the Jamaican Pattie that I got from a tiny one room restaurant on the side of the road for less than a dollar. The pattie consisted of a spicy, juicy meat filling that was wrapped in the most tender flaky crust I’d ever eaten. It was the kind of food that you inhale in two bites, lick your fingers and go back for more. They sell a frozen version of the Jamaican pattie in the grocery store but I’m afraid to try them for fear that I will be sorely disappointed. Of course, I don’t need to buy them from the store since I happen to have a friend who can make them from scratch. In my opinion Heather makes a pretty mean pattie. One time she came over with a baking dish mounded high with these spicy little delights. We ate them for days and still wished for more.
 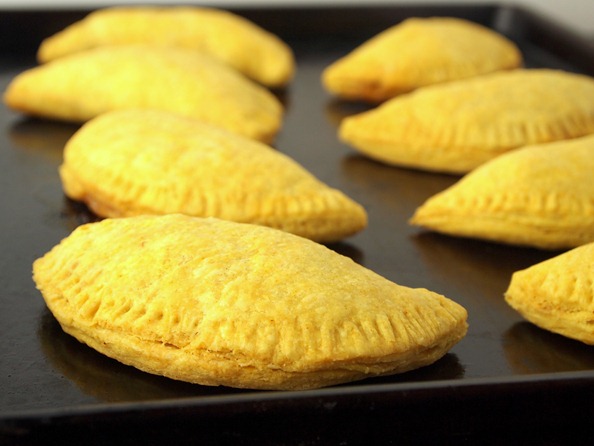 Heather happily shared her recipe for patties with me and I happily went about making them with only a few minor adjustments (I can’t help myself- no recipe is safe in my hands). Actually, the changes were per her request. She gave me the recipe with a warning that she has never felt the crust was quite right- not as flaky yet tender as the real deal. She was anxious to see if I could remedy this problem. Not one to take a recipe challenge lightly, I eagerly set about trying to create the perfect pattie crust. Heather hasn’t tried them yet (I will make another batch the day before the Super Bowl ) but it is my humble opinion that the crust came out simply amazing. It’s flaky yet still has a chewy bite to it. It’s thick enough to handle the moist filling yet thin enough to not overpower the flavor of the meat and spice inside. The secret…a technique called Fraisage. This is a pastry making technique where you basically smear the butter into the dough with the heel of your hand creating alternating layers of butter and dough. The result in a super flaky crust. Since I couldn’t photograph myself while I was making the dough here is a YouTube video that gives you a visual tutorial of Fraisage. It’s actually a really simple technique with amazing results.
When you think about it the Jamaican Pattie really is the perfect Super Bowl food. It can be eaten with one hand while you drink beer with the other hand, it’s got a spicy kick to it, and the filling is made primarily of meat. What more could you want from a Super Bowl Food?
Jamaican Patties
Recipe slightly adapted from my friend Heather and her Jamaican husband Gary
Makes 8 5-inch patties
Dough
2 cups all-purpose white flour
1 teaspoon turmeric
1 teaspoon salt
12 tablespoons (1 1/2 sticks) cold unsalted butter
1/2 cup ice water
Filling
1 small onion, minced
1 scotch bonnet pepper, or two jalapeno peppers, minced (include the seeds for more spice, keep them out for less- I used two jalapenos with the seeds and it was pretty high on the spice meter)
1 tablespoon olive oil
1/2 pound ground chicken or beef
1/4 teaspoon dried thyme
1/4 teaspoon chili powder
1/2 teaspoon dried rosemary
1/4 cup chicken or beef stock (depending on which meat you are using)
1/4 cup water
salt to taste
1. In a large bowl whisk together the flour, turmeric and salt. Cut the cold butter into tablespoon size pieces and drop into the flour. Using your fingers break up the butter in the flour until it resembles pea sized pieces. Mix in the ice water with a wooden spoon until a very shaggy dough forms. You will still have big lumps of butter and lots of unincorporated flour. Dump the whole thing out on the counter and using the heel of your hand drag a portion of the dough from one end of the pile to the opposite end. Repeat this procedure until a dough forms. At this point you should not have any big lumps of butter and the dough will be smooth and uniform. Wrap the dough in plastic wrap and refrigerate while you make the filling.
2. In a medium size skillet heat the olive oil over medium-high heat and add the onion and pepper. Cook, stirring often until they soften, about 4 minutes. Add the ground chicken or beef along with the thyme, chili powder and rosemary. Brown the meat for about 10 minutes until it is no longer pink. Add the stock and water, turn the heat down to medium-low and simmer for 20-25 minutes until the liquid is reduced to a sauce.
3. Divide the dough, re-warp one half in plastic and return to the fridge. Place the other half on a floured surface and roll out to 1/8 of an inch thick. Using a 5-inch diameter round cutter (I used an upside down bowl) cut out 4 circles. Place 2 scant tablespoons of filling on one half of the dough, leaving a 1/2-inch border near the edge. Using you finger tip, moisten the edge with a bit of water, fold the dough over and seal with a fork. Repeat the procedure with the second half of the dough.
4. At this point you can freeze the patties if you are making them ahead. Place them on a baking sheet and stick them in the freezer for a bout half an hour. When they are frozen enough to hold their shape and not stick together, place them in a single layer in a large freezer bag. When you are ready to bake simply place the frozen patties in a 350ºF oven for about 40 minutes.
3. If you are cooking them right ways preheat the oven to 350ºF. Cook the patties on an ungreased baking sheet for 22-25 minutes. Serve hot.


