Mar
Peppermint Tea Dark Chocolate Brownies
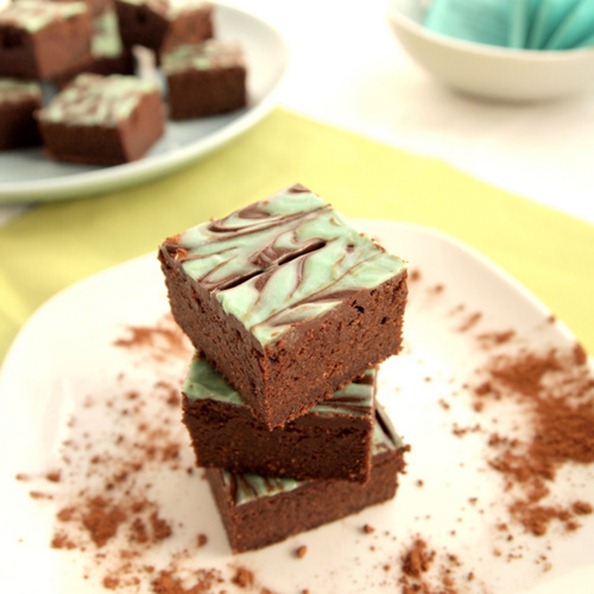
Hmmm…tea or brownies? Tea and brownies? How about tea in brownies! If you love tea and you LOVE brownies (who doesn’t love brownies? ) this recipe is for you. Dense fudgy,dark chocolate laden brownies spiked with an earthy mint flavor reminiscent of your favorite cup of tea. It’s a chocolate and mint lovers dream. This special brownie was inspired by a recipe that I pulled out of a magazine years ago, filed away for future use and promptly forgot about. For ten years. Yup, the date at the bottom of the page says August/September 2002. Wow, I guess I should go through my recipe file more often. The funny part is that when I saved the recipe I didn’t know it had tea in it. I thought it was just your normal mint brownie made with peppermint extract. The main reason I saved it all these years was because of the pretty marbled white chocolate glaze that covered the brownie.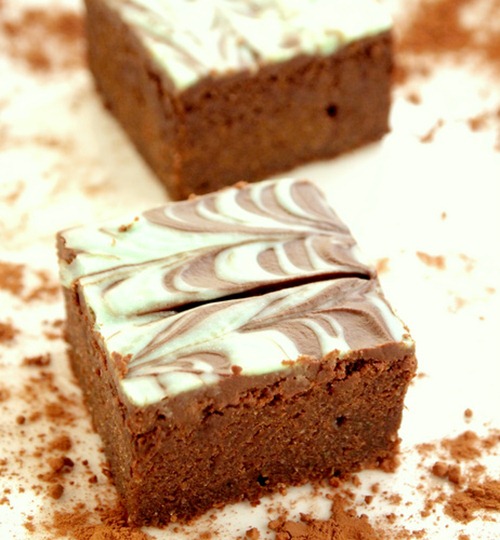 It wasn’t until I read through the ingredients and spotted the tea that I realized what a special recipe this was. Despite my initial excitement, in the end I used the tea portion of the recipe and a modified version of the glaze, but not much else. The reason? It called for 2 1/2 sticks of butter and 2 cups of sugar!!! Granted, the recipe made a 9 x 13-inch pan of brownies which is pretty big, but even cut in half this recipe has more butter and sugar than any brownie would ever need. I have a brownie recipe from Cooking Light that I often use as a base for any brownie that I create. It’s thick and fudge-like with lots of chocolate flavor but only 5 tablespoons of butter and a mere 3/4 cup of sugar. Lots of indulgent flavor but no so many indulgent ingredients.
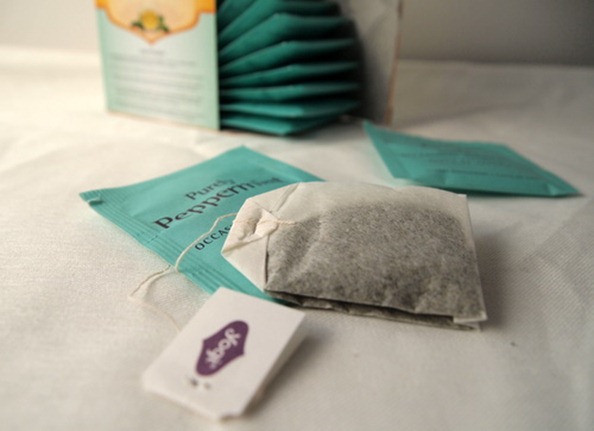
The tea I used was Yogi Purely Peppermint, but any herbal peppermint tea will do. I like the Yogi brand because they have a whole line of teas for specific aliments like Bedtime tea, Calming tea and my favorite Throat Comfort. I swear this is the best remedy for a sore throat out there. Beside their awesome teas, the other thing I love about the Yogi brand is that each tea bag comes with an inspirational message. And who couldn’t use a little inspiration with their tea…or their brownies?
The recipe instructions said to grind the sugar and tea leaves together in a food processor. Honestly, I’m not totally convinced that this step is necessary. My tea leaves were pretty well ground to begin with and I’m pretty sure that simply stirring the sugar and tea together would have produced the same result. But I did it anyway. I did it because when trying something new I‘m often struck with a debilitating fear that if I don’t follow the directions exactly I will be doomed to imminent failure. Let’s just say that in this case I took one for the team. I ground that sugar and tea so that you wouldn’t have to. Or go ahead and grind…who am I to tell you to break the rules? 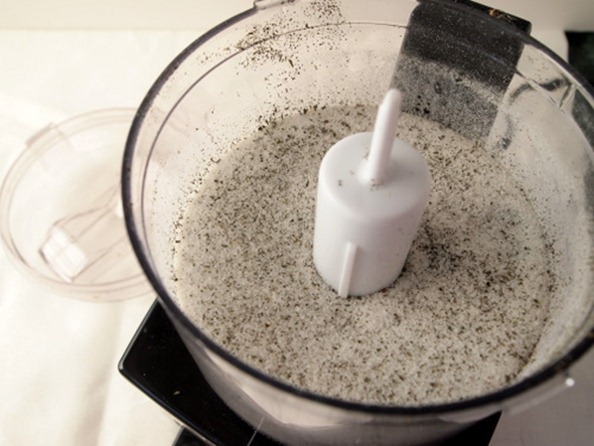
Grinding or no grinding, the end result is a thick, fudge-like batter laced with a refreshing minty aroma. 
I had mine with what else… a mug of hot steaming tea.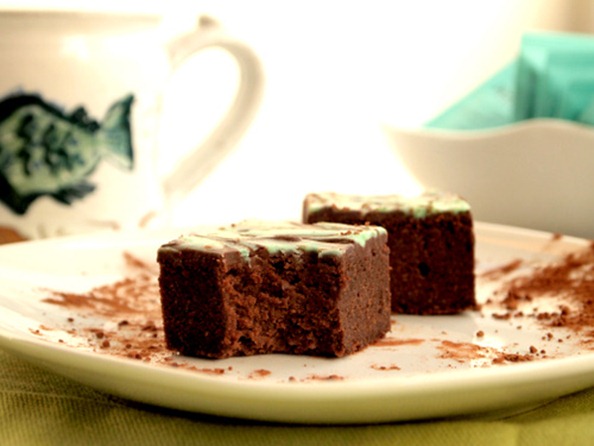
Peppermint Tea Dark Chocolate Brownies
inspired by Cooking Light and Fine Cooking
Makes 16 small or 12 medium brownies
1/2 cup whole wheat pastry flour
1/2 cup white flour
1/2 cup unsweetened cocoa
1/4 teaspoon salt
1 teaspoon peppermint tea (from 1 teabag)
3/4 cup granulated sugar
5 tablespoons unsalted butter
2 ounces dark chocolate
1 teaspoon peppermint extract
3/4 cup milk
1 egg
2 egg yolks
2 ounces dark chocolate
1 tablespoon butter
1 ounce white chocolate
~1 tablespoon milk
green food coloring (optional)
1. Preheat the oven to 350ºF. Line an 8-inch square baking dish with parchment paper. Cut the paper long so it overhangs the edge of the dish on two sides. This will make it easy to remove the brownies before frosting.
2. In a medium bowl sift together the flours, cocoa and salt. In a food processor grind together the sugar and tea, add to the flour mixture. (This step can be skipped if you don’t have a food processor, just add the sugar and tea to the flour mixture and combine).
3. Place 2 ounces of dark chocolate and 5 tablespoons of butter cut into pieces in a small bowl. Microwave on high for about one minute in 20 second intervals. Stir between each interval. When the chocolate and butter are melted stir in the peppermint extract. Set aside to cool slightly.
4. In a small bowl whisk together the milk, egg and egg yolks. Add to the flour mixture and stir with a wooden spoon until completely incorporated. Fold in the chocolate mixture until just combined. The batter will be thick.
5. Pour into the prepared pan and tap on the counter to level. Bake for 25-30 minutes or until a wooden skewer inserted comes out clean. Place on a wire rack to cool. After about ten minutes pull the parchment edges and lift the brownies out of the pan. Let cool completely before frosting (about 1 hour).
6. When the brownies are cool melt the remaining 2 ounces of dark chocolate with 1 tablespoon of butter using the same method of 20 second intervals for about 1 minute total. Set aside and melt the white chocolate with a scant tablespoon of milk. Add more milk if needed until the white chocolate is the right consistency to drizzle over the brownies in a thin line. Add the food coloring one drop at a time until the desired green color is achieved. When both chocolates are melted pour the dark chocolate over the brownies and spread smooth. Drizzle the white chocolate over top in straight lines and drag a toothpick through the chocolate in alternating directions. Put the brownies in the fridge to cool for at least 2o minutes. Remove and cut into 12 or 16 pieces.
Mar
Turkey Veggie Meatloaf with Caramelized Onions
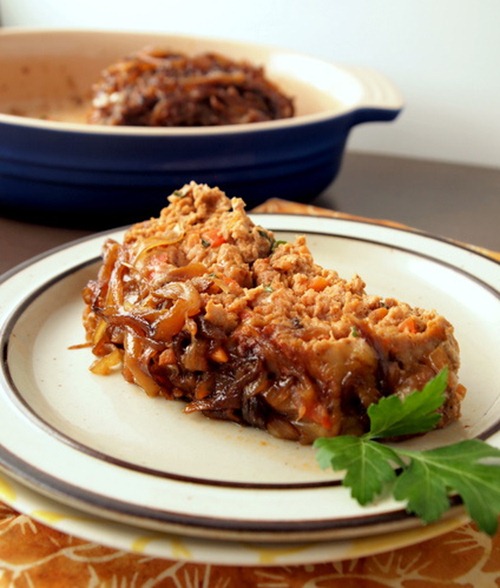 I happen to think that meatloaf is pretty high up there on the comfort food scale. It’s kind of like mac n’ cheese or mashed potatoes. When you eat it you just feel good. I’ll be the first to admit though that meatloaf can be…well…kind of boring. It’s one of those dishes that I would never order in a restaurant for fear that it might be tasteless, or dry, or just down right bad tasting. At home though, it’s a different story. I consider myself somewhat of a meatloaf aficionado and over the years I’ve perfected my meatloaf recipe to the point where I can now proudly declare this to be the Best Meatloaf Ever. I know it’s a bold claim to make, but I stand by it. What makes this meatloaf so special, besides the topping of gooey cheese and candy-sweet caramelized onions, is the addition of lots of veggies. Sounds weird right? I mean it’s called meatloaf, not vegetable loaf. Stick with me though- I promise this will be good. The veggies in the meatloaf serve three purposes. First, they add moisture, second they add flavor, and third they add the ever important healthy bits. The last part is especially important the next day when your eating a huge slab of meatloaf in between two pieces of thick bread…and oops now you’re too full for salad. No big deal- the veggies are already in the loaf!
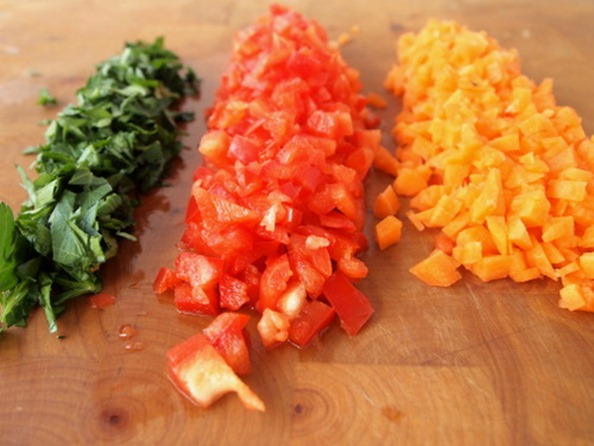
I’ve tried all sorts of different veggie combinations in my meatloaf. Zucchini, spinach, green beans, peas, corn, you name it, it’s gone in meatloaf. In the end I always come back to the simple pairing of carrot and sweet red pepper.This combo provides just the right amount of moisture and as a bonus it adds a nice punch of color to what would otherwise be just a boring brown loaf. I also add a bit of flat leaf parsley if I have it on hand because I like its mild peppery flavor…it also rounds out the color spectrum quite nicely. I used to cook the veggies before I added them to the meat, but over the years I’ve learned that if you chop them up fairly small (especially the carrots) and add them raw they will cook inside the loaf and infuse the meat with juicy vegetable goodness. 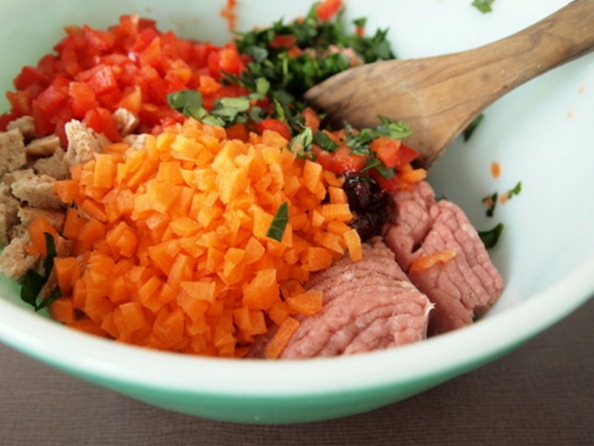
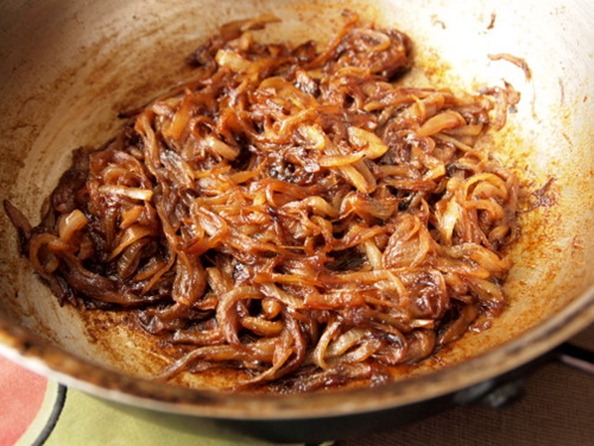
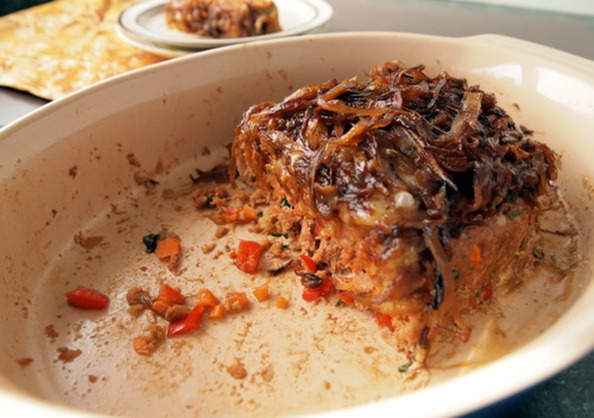
The other trick to a winning meatloaf- a free formed loaf. Traditionally meatloaf is cooked inside a bread loaf pan. While this method does yield a perfectly shaped loaf, it also means that you have to cook the meatloaf longer (increasing the chance it could dry out) and it eliminates the delicious extra “crust” that results from the free form method. I’ve found that if you cook your loaf in a baking pan just a bit bigger than loaf itself (about a 1-inch border of space around the edge) the air circulates around the meat allowing it to cook evenly and creating a tasty crisp exterior all around. 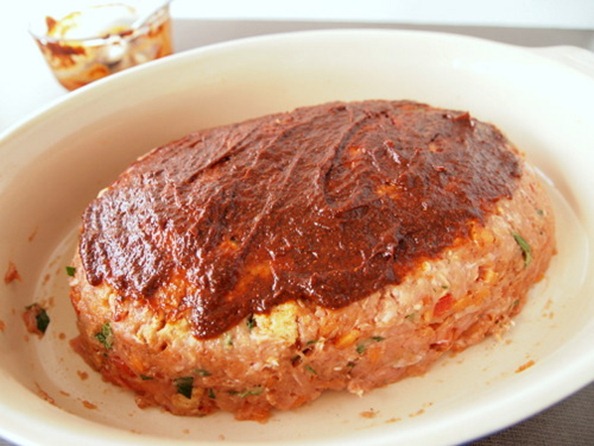 Now for the topping. This meatloaf is quite excellent on it’s own. It really doesn’t need a thick layer of melted cheese and sweet onions to be delicious. But let’s face it, good food is almost never about need and almost always about want. And you WANT these onions. If I had my way caramelized onions would be packaged and sold as candy. Sweet, oniony candy that I want to eat by the bowlful. Okay, that’s a little strange I admit, but what I’m trying to say is that even on their own caramelized onions rock and when combined with cheese and meatloaf…well words alone can’t describe the perfection of this combination. Yes, making the caramelized onions is an extra step- a 40 minutes extra step- but totally worth it. I promise.
Turkey Veggie Meatloaf with Caramelized Onions
Serves: 8
1 1/2 pounds ground turkey
2 carrots, finely chopped
1/2 sweet red pepper, finely chopped
1/4 cup flat leaf parsley, finely chopped
1 egg, lightly beaten
1 slice soft whole wheat bread, crumbled
2 tablespoons ketchup
1 tablespoon chili powder
salt and pepper
3 tablespoons unsalted butter
2 medium yellow onions, thinly sliced
1 1/2 tablespoons brown sugar
1 tablespoon balsamic vinegar
3-4 ounces sharp cheddar cheese, sliced
1. Preheat the oven to 375ºF. Combine the turkey, carrots, red pepper, parsley, egg and bread in a medium bowl. In a small bowl mix together the ketchup and chili powder. Add half the ketchup-chili mixture to the meat. Season with a dash of salt and few grounds of pepper. Mixt well with a wooden spoon or your hands.
2. Form the meat mixture in a loaf shape and place in a baking pan only slightly larger than the loaf. You can smooth the edges with a spoon but don’t worry too much about making it perfect. Spread the remaining ketchup-chili sauce over the top of the loaf.
3. Bake for 40 minutes. Remove from the oven, lay the cheese slices over the top and pile on the caramelized onions (instructions below). Return to the oven for another 15 minutes. Let stand for about 10 minutes before serving.
4. The most efficient way to make this dish is to have the onions sliced and ready to go in the pan before you assemble the meatloaf. Don’t try to cook them while you are assembling the meatloaf though because they need frequent attention and if you’re anything like me two tasks at once is one too many. When the meatloaf goes in the oven melt the butter in a shallow pan over medium-high heat. Add the onions and cook, stirring often for about 10 minutes or until the onions begin to brown.
5. Turn the heat down to medium and continue to cook for another 20 minutes. Stir frequently, scraping the browned bits from the bottom of the pan. If it seems like the onions are burning turn the heat down. You can even add a tablespoon of water if you need to. The idea is to cook these onions slowly so they caramelize and not to brown them too quickly. After 20 minutes the onions should be complete wilted and have turned a deep golden brown. Now is when you add the brown sugar and balsamic vinegar. Stir well, turn the heat down a bit more and cook for another 10 minutes. Don’t forget to stir and scrape frequently. When the onions are done follow the instructions above to finish off the meatloaf.
Feb
Strawberry Orange Yogurt Smoothie
 I think I have spring fever. Except that it’s not spring. Not even close. Last week it was…I swear. The signs of spring were impossible to miss. Little green daffodil shoots coming up on the side of my driveway, patches of grass poking their way through the melted snow and glorious sunlight streaming through my bedroom window at the happy hour of 7 am. Surely this meant spring was just around the corner. Wrong. So very wrong. Nearly three feet of snow dumped on us last weekend and more is expected to arrive tomorrow. So much for my early spring wish. I was determined not to let it get me down though. The first thing I did was go out and enjoy the fresh snow. Finally some white fluffy stuff to play in!
The second thing I did was make a smoothie with the most spring-like ingredient I could find…strawberries. So what if they had to be shipped all the way from Florida for me to enjoy them. Sometimes a girl has got to let herself indulge. In addition to strawberries and oranges from far away places I also added some ground flax meal to my spring fantasy smoothie. I pretty much always keep some of this stuff around because it’s an easy way to add fiber and healthy Omega-3 fats to your diet. I recently discovered that my favorite flour brand, King Arthur, makes a ground golden flax meal that is perfect for baking with and adding to smoothies.  I always use my immersion blender to make smoothies. For one because l I don’t own a regular blender, and two because it requires less clean up and who can argue with that! I like to make the smoothies one at a time in the plastic cup that came with my blender. It’s kind of a necessity because the immersion blender won’t quite fit all way down in the bottom of a tapered pint glass, and as a bonus the plastic cup has handy measuring marks on it.
 Strawberry Orange Goodness

Strawberry Orange Smoothie
makes 1 large or 2 small smoothies
4 ounces (1/2 cup) plain non-fat Greek yogurt
1 orange, peel and pith removed cut into chunks
1/2 cup strawberries, stems removed cut in half
1/2 frozen banana (not frozen is okay)
1 heaping tablespoon ground flax meal
1/2 cup vanilla almond milk (or use regular milk, soy milk, rice milk, etc.)
Combine all the ingredients in a blender or an individual cup and blend until frothy.


