Mar
Sweet Potato, Smoked Mozzarella + Kale Grilled Pizza
Things have been kind of wacky around here lately. Wacky as in it’s March 20th and the temperature is supposed to reach 80 degrees today…and tomorrow…and the next day! We’ve been experiencing out of the ordinary weather all winter, but in the last week things suddenly changed from slightly warmer and dryer than average to weather that here in Vermont doesn’t usually happen until June- if we’re lucky. This past Sunday a record was broken in Burlington for the highest temperature ever recorded- 79 degrees. The previous record was 66 degrees. That’s 13 degrees warmer! (yes, I know you can do math but I just had to point out the enormous jump in temps) Chances are that these beautiful summer days in the middle of March won’t last much longer. Next week the temperatures will probably drop back down to normal, and in all likelihood it will snow at least one more time before winter is truly over. For now though, there’s nothing to do but enjoy the gift that we’ve been given. Spending time sitting on the porch, raking the yard, walking the dog in a t-shirt, sleeping with the window open, breaking out my flip flops and of course, one of my favorite summer activities…grilling!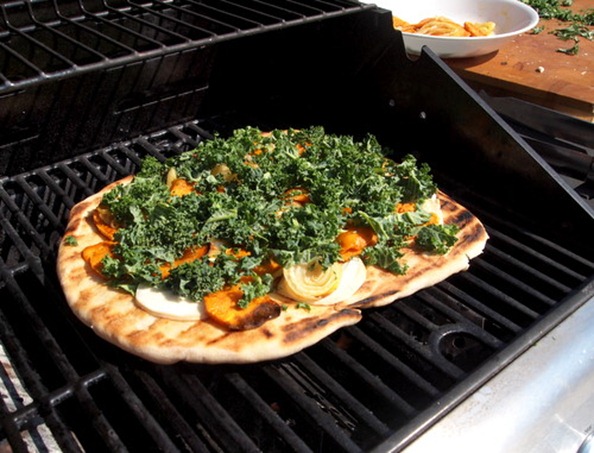
I like to grill everything, and I do. Meats, vegetables, shish kabobs, sandwiches, pizzas…you name it and I will grill it. I know, I know, a women (gasp) who like to grill. For some strange reason grilling is often considered a man’s job. Does anyone else think this is weird, and kind of wrong? There are men who couldn’t make a pot of pasta to save their lives yet give them a slab of meat and a hot grill and they will cook it up like they’re the head chef at a 5 star restaurant. And there are women who can whip up anything in the kitchen but wouldn’t dream of firing up the grill. What’s up with that? If I’m being honest it’s the latter that annoys me the most. What are you too lady-like for the grill? Is it too dirty for you? Are you scared of the fire? I just don’t get it. I’m proud to admit that in this household my husband it secure enough in his manliness to leave the grilling to me. And I in turn am confident enough in my feminine side to know I can use the grill, and use it well. So come on ladies, it’s time to get grilling!
On to the recipe. The key to a successful grilled pizza is having all the ingredients ready to go before you even turn the grill on. This of course includes the dough if you are making it yourself, but also any toppings that may need to be cooked.
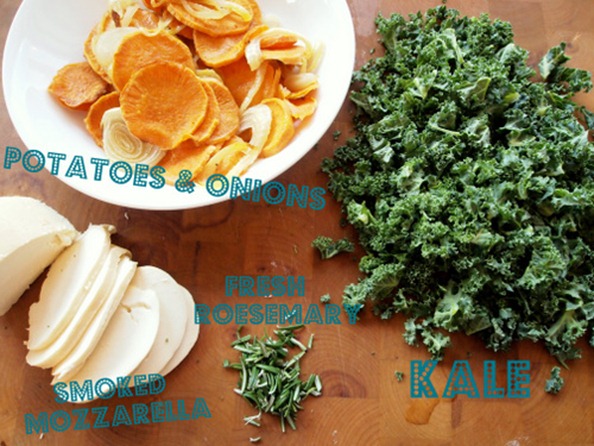
Grilled pizza happens very fast and the topping are really only on the grill long enough to melt the cheese so anything you don’t want to eat raw needs a quick cook before hand. For this pizza I went with a kind of wintery mix of sweet potatoes, onions, kale and a smoky fresh mozzarella. This is my nod to the fact that it still is only March and things like fresh tomatoes and basil are still very far away from being in season. The sweet potatoes and onions are tossed with a little olive oil, salt and fresh pepper before they are briefly roasted in the oven. If you have a good grill basket you can do this step on the grill. I chose not to because I wanted the potatoes sliced thin and I have a bad habit of burning them on the grill when they are cut this thin. 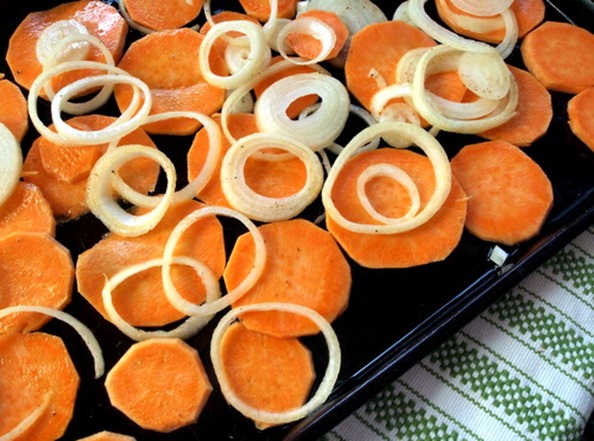
Another tip for grilled pizza is to keep it small. Don’t try to make a huge pizza that takes up the entire grill because when it comes time to flip it things will get tricky real fast. Also, you want one side of the grill searing hot so you can achieve a crispy grilled crust and the other side low heat for melting the cheese. If your pizza is too big you won’t be able to slide the cooked crust over to the cool side for cheese melting. The result will be a burnt crust and cold cheese. If you can’t tell, this has happened to me more than once. Now I always make two small pizzas and cook the second crust while the first one is on the cheese melting side. Oh, one last tip- grilled pizza doesn’t have to be round. The best shape is the one that fits your grill best. For me that is a kind of rectangular oval with wavy edges. Here is small pizza number one. Se how the crust is starting to bubble in the middle- yummm!
And here it is flipped over and cooking on the second side. Look at those beautiful grill marks.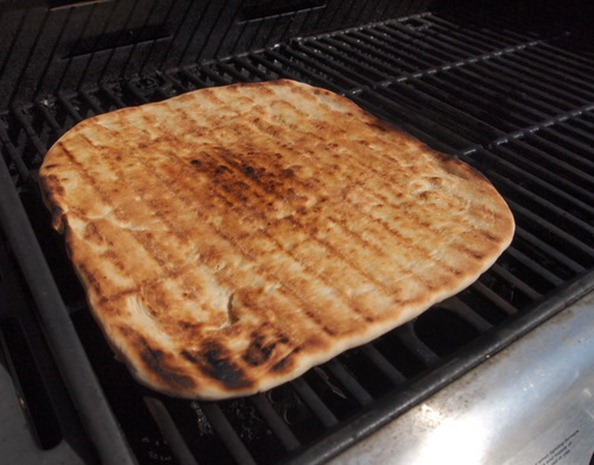
Now I slide it over to the cool side and load up the toppings, close the lid to let the cheese melt.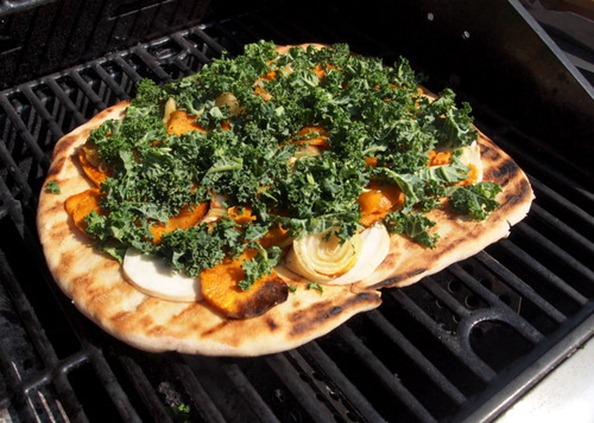
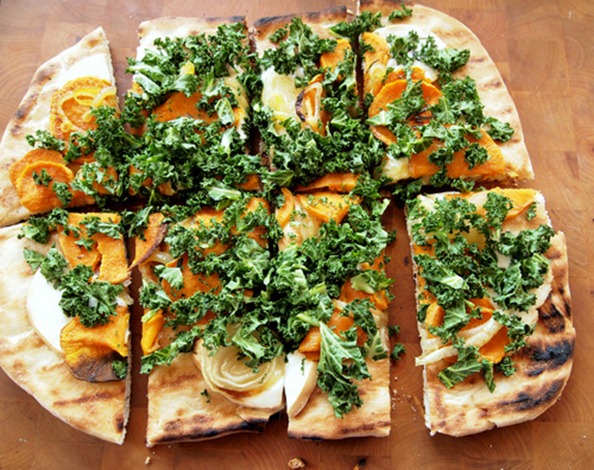
The finished product. Crisp crust, melted smoky cheese, roasted sweets and onions, and crunchy kale with just a sprinkle of fresh rosemary. Now this is how a real woman uses a grill.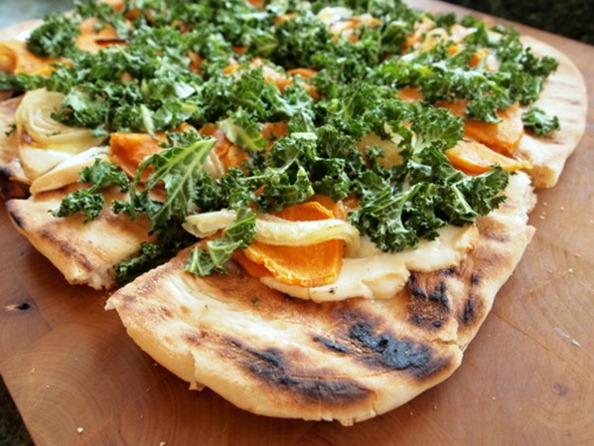
Sweet Potato, Smoked Mozzarella + Kale Grilled Pizza
inspired by Two Peas & Their Pod
For the crust (or you can buy premade dough)
1 cup warm (not hot)m water
2 cups bread flour
1 cup whole wheat flour
1 package yeast
1/2 tablespoon honey or sugar
2 tablespoon olive oil
1 teaspoon salt
Toppings
1 large sweet potato, peeled and sliced thin
1 medium yellow onion, sliced thin
salt and freshly ground pepper
2-3 tablespoons olive oil, divided
2 cups kale, coarsely chopped
8 ounces fresh smoked mozzarella
1 tablespoon fresh rosemary
coarse salt
1. Make the crust. In a large bowl combine the warm water, yeast and honey or sugar. Whisk and set aside for 10 minutes or until foamy. Add the olive oil, salt and bread flour and stir with a wooden spoon until a dough forms. Place the dough onto a well floured surface and knead for about 10 minuets incorporating in the 1 cup of whole wheat flour a little at a time. The dough with be soft, elastic and slightly sticky. Put it in a bowl and brushed with a bit of oil and drizzle a little more on top. Cover with a clean dish towel and let rise until doubled in size, one to one and half hours.
*Make ahead tip: After the dough is done rising you can punch it down, divide it in 2, roll it into balls and refrigerate in a sealed plastic bag until the next day.
2. Prepare the toppings. Preheat the oven to 400ºF. Combine the sweet potato and onion on a large rimmed baking sheet. Drizzle with 1/2 tablespoon of olive oil and sprinkle with salt and a few grinds of pepper. Roast, stirring once halfway through for 20-25 minutes or until the potatoes are soft.
3. When the dough is done rising preheat the grill. If you have 4 burners turn 2 on medium high and 2 on low. If you have only 2 burners turn one on medium-high and one on low.
4. Punch down the dough and place it on the counter. Cut it in half and place one half back in the bowl covered by the towel so it doesn’t dry out. Take the other half and stretch it into the shape you desire (it’s best to make a shape that fits your grill). Thick or thin crust is up to you, but a thin crust will develop more bubbles and lovely charred grill marks. Place the dough on a baking sheet and repeat with the second half.
5. Before you start grilling the crust make sure everything you will need (toppings, olive oil, salt, tongs) are close by because once you start cooking there is little time to run back and forth to the kitchen. Brush the top of one crust with olive oil and place it oil side down on the hot side of the grill. The best method it to put one side down first and stretch the rest out over the grates. Don’t worry if it becomes misshapen. Believe me, your moth won’t mind. Let the crust cook for 2-4 minutes with the lid closed, occasionally lifting the dough with the tongs to check for burning.
6. When it looks nice and golden brown on the bottom brush the top with olive oil, sprinkle it with salt and flip it over. Place the toppings on the pizza and then slide over to the cooler side of the grill. About 2 minutes is all you need to cook the second side of the crust. If you think its will take you longer than that to arrange the toppings be sure to move it to the cooler side of the grill. Now you can place the second dough on the hot side of the grill and repeat the process. By the time the second pizza needs to move over to the cool side the first one will be ready to take off the grill. Slice and serve immediately.
Mar
Honey Sweetened Meyer Lemon Tarts

I wish I had a scratch and sniff computer…actually I wish you had a scratch and sniff computer. That way you could be as enchanted by the floral aroma of these wonderful little Meyer lemons as I am. These lemons are so fragrant that even before I zested the peels, sliced them open and squeezed out the juice a honey tinged, fresh lemon scent was wafting around my kitchen. I first used Meyer lemons about a month ago when I made Carrot Muffins with Meyer Lemon Glaze. They were good…in fact they were eat two in a row good. The moist carrot muffins studded with lemon zest and drizzled with a thin honey lemon glaze were perfect for my first experiment with these special, slightly sweet lemons. This time though when I brought home a bag filled with the egg yolk colored little cuties I knew I wanted to make something that really let the lemon flavor shine. I wanted a bust of pure lemon flavor in every bite. I wanted to make a recipe that used LOTS of lemon juice…
and lots of lemon zest. So naturally I turned to lemon curd. Curd is all over the Internet these days (could someone please come up with a better name for it than curd) – lemon curd, blood orange curd, grapefruit curd, key lime curd- you name the citrus and someone has made a curd out of it. 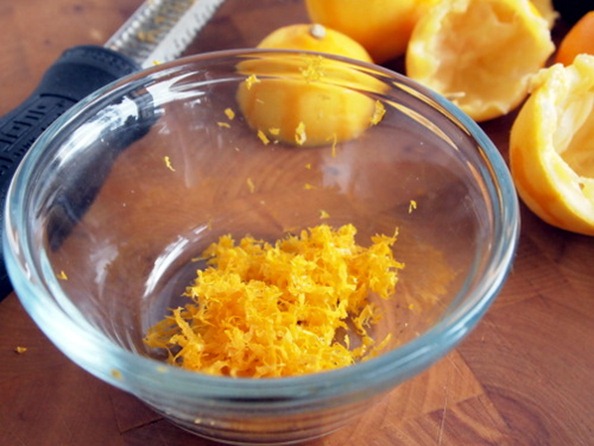
For a long time lemon meringue pie was one of my favorite desserts which means that I’ve made quite a bit of lemon curd in my life time. Never with Meyer lemons though. And never with honey! I spotted this recipe over on the Cookie + Kate blog where she made both a blood orange and a Meyer lemon curd sweetened with honey instead of white sugar. Since I loved the honey and lemon glaze that I made for my carrot muffins I was eager to try it. It was totally the right choice. The honey adds just a touch of sweet to the floral-scented Meyer lemons and the result is a slightly sweet yet wonderfully tangy smooth curd. The other tip that I picked up from Kate was how to make lemon curd with no straining and no risk of cooked egg bites tarnishing the final product. Basically the idea is to cream the butter and honey like you would if making a cake, then incorporate the eggs and juice before cooking. It worked really well and will defiantly be the method I turn to from now on when making any kind of curd.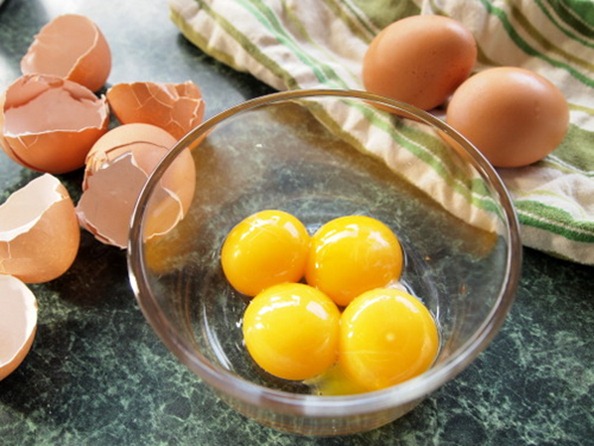
For the tart crust I decided on a sweet buttery shortbread type with lots of ground almonds. I love the nutty flavor that the almonds lend to the dough and they also provide a bit of crispy texture that compliments the silky smooth curd perfectly. 
I made mini tarts and blind baked them filled with pie weights. If you don’t have pie weights you can use dried beans but be sure not to skip this step altogether. If you try to bake the tart crust without weights the dough will bubble up in the middle leaving no room for the delicious lemon curd. Believe me, I’m telling you this from experience.
Here they are fresh out of the oven. Almost good enough to eat even with out the lemon curd.
And here they are filled with sweet and tangy lemon curd and topped with fresh whipped cream.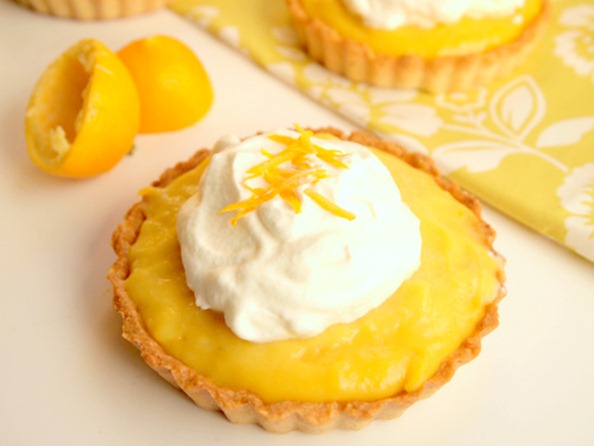
Honey Sweetened Meyer Lemon Tarts
Adapted from Cookie + Kate and Taste of Home
Makes (3) 4 1/2 inch tarts or (1) 9 inch tart
Lemon Curd:
4 tablespoons unsalted butter, cut into small pieces
1/3 cup honey
4 egg yolks
2 eggs
2/3 cup Meyer lemon juice (from 7-8 lemons)
1 tablespoon Meyer lemon zest
Almond Crust:
1 cup white unbleached flour
1/2 cup slivered almonds
1/4 cup sugar
6 tablespoons unsalted butter, room temperature
1/2 teaspoon almond extract
1/4 teaspoon salt
2-3 tablespoons ice water
For the topping:
Whipped cream
Meyer lemon shavings
1. Make the crust: Pulse the almonds in a food processor until finely ground. Add the flour, sugar, butter, almond extract and salt and pulse until combined. Slowly add the ice water 1 tablespoon at a time until a soft dough forms. Using your hands form the dough into a ball, place it between two pieces of parchment or wax paper and flatten to a disk shape. Wrap the edges of the paper tightly around the dough and refrigerate for 1 hour. (Alternate directions: Since I only have a small one-cup food processor I used it to ground the almonds and then transferred them to my stand mixer where I finished the dough. I followed the same process; mixing all the ingredients together and then adding the ice water a little at a time until a dough formed. It worked perfectly, the only drawback was more dishes to wash.)
2. Preheat the oven to 350ºF. Remove the dough from the refrigerator and unwrap the sides of the dough, but leave it between the sheets of paper for rolling. This prevents the dough from sticking to the surface and your rolling pin without using flour. Start by pressing the dough with the rolling pin from the middle to each end, turning the dough 180 degrees and repeating. Continue rolling the dough into a circle about an 1/8th inch thick. If making small tarts, cut out circles slightly larger than the pans you are using (my tartlets pans are 4 1/2 inches wide so I cut out 5” circles) and press the dough into the pans. If you are making one large tart, place the entire dough circle over the pan, press it into the bottom and corners and trim the edges.
3. Cut pieces of parchment paper or aluminum foil large enough to cover the bottom of the crust and extend out a bit over the edges of the pan. Place the paper or foil over the crust (s) and fill with pie weights or dry beans. Bake for 20 minutes, remove the weights and paper or foil and continue baking until the edges turn a light golden color, about 5 –7 more minutes. Remove from the oven and let the crust cool.
4. Make the Lemon Curd: In the bowl of a stand mixer, or in a medium size bowl if using a hand mixer, mix the butter and honey until creamy, about 3-5 minutes. Slowly add the egg yolks and whole eggs; beat until combined. Add the lemon juice and mix briefly. Don’t worry if the batter looks lumpy, it will smooth out on the stove top.
5. Transfer the mixture to a medium size non-reactive pot (not aluminum or unlined copper) and cook over medium-low heat stirring constantly. The mixture will begin to thicken after about 5 minutes. Continue stirring until it it thick and jelly-like. Test for doneness by running your finger over the back of a wooden spoon coated in the curd- if it leaves a clear path it is ready. For me it took about 7 minutes for the curd to finish. Remove from the heat and stir in the lemon zest.
6. Pour the lemon curd into the cooled tarts shells.* Before serving top with whipped cream and a sprinkle of shaved lemon peel if desired.
*If you are not using the lemon curd right away transfer it to a bowl and place a piece of plastic wrap over the top letting come in contact with the curd. Gently press the plastic into the top of the curd until it is completely covered. This will prevent air from forming a crust on top of the curd. Refrigerate until ready to use.
Mar
Poppy Seed Everything Rolls
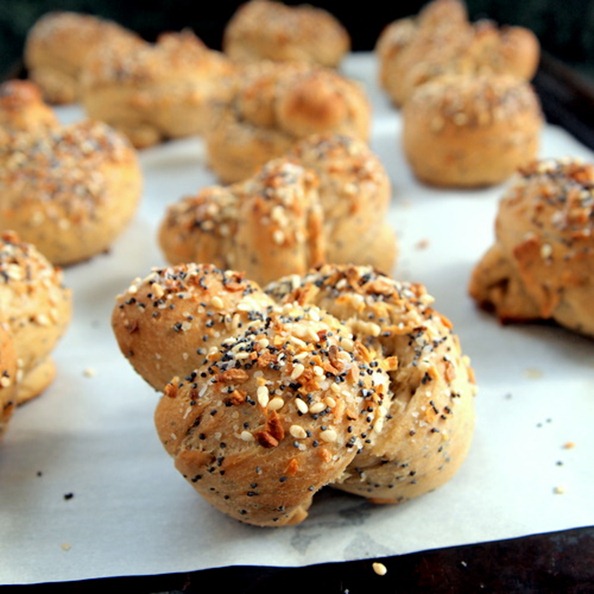
Last week I experienced a sort of bread mania. It all started with our trip to Trader Joe’s and a loaf of their incredible Multi-Grain Seed Bread. I buy this bread every time I go to Trader Joe’s- which unfortunately is not very often because the closest one to where I live is 150 miles away! Come on Trader Joe’s, get with it. Us country folks like good food too. I’m not saying that we don’t have some wonderful local bakeries around here, because we do. Lots of them in fact, but none that make this particular bread. Loaded with poppy seeds and topped with a mixture of various seeds like sunflower and flax, this bread is flavorful, crunchy and very addictive. We consumed the entire loaf in oh, about 2 days and even then I couldn’t stop thinking about the poppy seed laced dough with the crispy topping (maybe it’s good we don’t have a TJs close by). Then a thought popped in my head…I’ll make my own. But I will make it whole wheat instead of multi-grain, and I will form the dough into rolls, and I will tie the rolls into a knot shape, and I will sprinkle them with a crunchy super flavorful everything bagel topping, and I will eat them all!. Yes, this is really how my mind works. I progressed from whole wheat to knot shapes to a salty garlic tinged topping all in one delicious burst of inspiration. 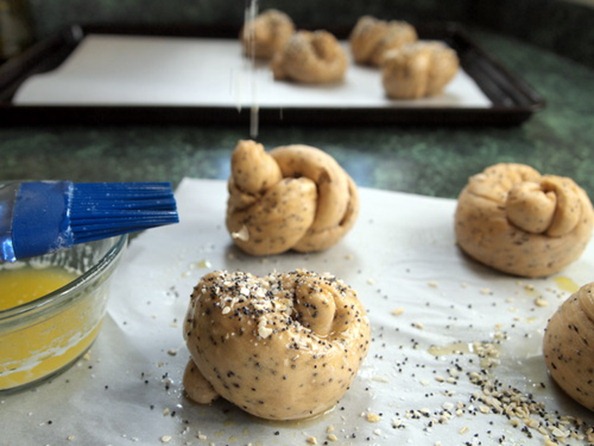
The result? A hearty, chewy roll flecked with tiny poppy seeds and topped with a satisfying crunchy and super flavorful mix of garlic, onion, salt and more seeds. Not a replica of the coveted Trader Joe’s bread, but a pretty satisfying stand in. Now if I could just figure out how to make a version of their Veggie and Flax Seed Tortilla Chips…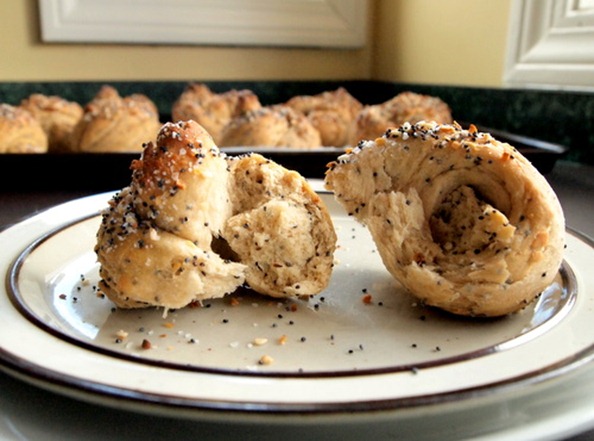
Poppy Seed Everything Rolls
adapted from King Arthur Flour
Makes 24 rolls
1 cup warm water
1 cup warm milk (any kind)
2 tablespoons yeast
2 tablespoons brown sugar
2 teaspoons salt
1/4 cup poppy seeds
2 cups unbleached white flour
3 cups white whole wheat flour
3 tablespoons unsalted butter, melted
Everything Topping
3 teaspoons poppy seeds
3 teaspoons sesame seeds
3 teaspoons dried garlic (minced or chopped)
3 teaspoons dried onion (minced or chopped)
2 teaspoons Kosher salt
1. In a large bowl, or a bowl fitted to a stand mixer, combine the warm water, milk, and yeast. Whisk well and add the brown sugar and 1 cup of white flour. Mix the flour and sugar into the yeast. Let sit for 10 minutes.
2. In a small bowl combine the salt and poppy seeds with the second cup of white flour. Add to the yeast mixture and mix with a wooden spoon or with the stand mixer on medium-low. Add 3 cups of white whole wheat flour 1 cup at a time until a dough forms and pulls away from the sides of the bowl.
3. On a well floured surface knead the dough until smooth. Place in a lightly oiled bowl covered with a dish towel or plastic in a warm spot for 1 1/2-2 hours, or until doubled in size.
4. When the dough is done rising punch it down in the middle and cut in half. Place one half back in the bowl and re-cover. Divide the other half of the dough into 12 equal pieces. Roll the pieces into a ball and cover with a towel. Working one at a time, roll the balls into snakes about 5 inches long. Tie each snake into a knot a place on a parchment lined baking sheet. Repeat with the remaining dough pieces.
5. Remove the other half of the dough from the bowl- you may need to punch it down again. Divide it into 12 pieces and using the same procedure as before form them into knots. Cover the knots and let rise in warm spot for about 30 minutes. They will be swollen and not quite doubled in size.
6. Preheat the oven to 400ºF. Mix together the topping in a small bowl. In another small bowl melt the unsalted butter. Brush the knots generously with the melted butter and sprinkle with the everything topping. Transfer the rolls to a baking sheet lined with a clean piece of parchment. Bake for 25 minutes, rotating the baking sheets halfway if they are on different levels in the oven. The tops will be golden brown and the seasoning will be lightly toasted.


