
Mar
Honey Sweetened Meyer Lemon Tarts

I wish I had a scratch and sniff computer…actually I wish you had a scratch and sniff computer. That way you could be as enchanted by the floral aroma of these wonderful little Meyer lemons as I am. These lemons are so fragrant that even before I zested the peels, sliced them open and squeezed out the juice a honey tinged, fresh lemon scent was wafting around my kitchen. I first used Meyer lemons about a month ago when I made Carrot Muffins with Meyer Lemon Glaze. They were good…in fact they were eat two in a row good. The moist carrot muffins studded with lemon zest and drizzled with a thin honey lemon glaze were perfect for my first experiment with these special, slightly sweet lemons. This time though when I brought home a bag filled with the egg yolk colored little cuties I knew I wanted to make something that really let the lemon flavor shine. I wanted a bust of pure lemon flavor in every bite. I wanted to make a recipe that used LOTS of lemon juice…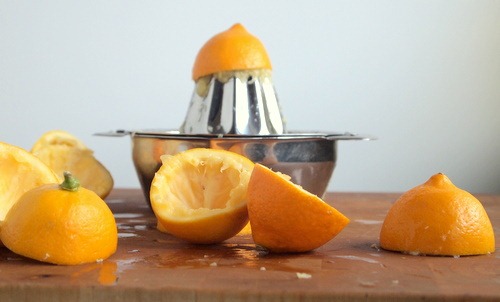
and lots of lemon zest. So naturally I turned to lemon curd. Curd is all over the Internet these days (could someone please come up with a better name for it than curd) – lemon curd, blood orange curd, grapefruit curd, key lime curd- you name the citrus and someone has made a curd out of it. 
For a long time lemon meringue pie was one of my favorite desserts which means that I’ve made quite a bit of lemon curd in my life time. Never with Meyer lemons though. And never with honey! I spotted this recipe over on the Cookie + Kate blog where she made both a blood orange and a Meyer lemon curd sweetened with honey instead of white sugar. Since I loved the honey and lemon glaze that I made for my carrot muffins I was eager to try it. It was totally the right choice. The honey adds just a touch of sweet to the floral-scented Meyer lemons and the result is a slightly sweet yet wonderfully tangy smooth curd. The other tip that I picked up from Kate was how to make lemon curd with no straining and no risk of cooked egg bites tarnishing the final product. Basically the idea is to cream the butter and honey like you would if making a cake, then incorporate the eggs and juice before cooking. It worked really well and will defiantly be the method I turn to from now on when making any kind of curd.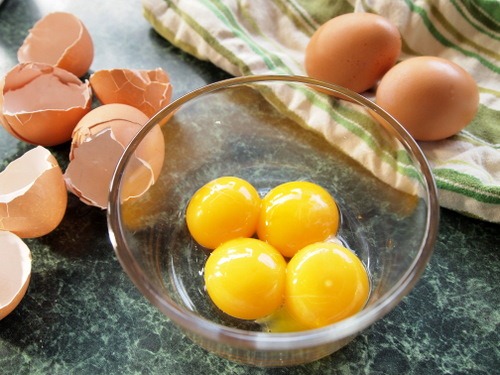
For the tart crust I decided on a sweet buttery shortbread type with lots of ground almonds. I love the nutty flavor that the almonds lend to the dough and they also provide a bit of crispy texture that compliments the silky smooth curd perfectly. 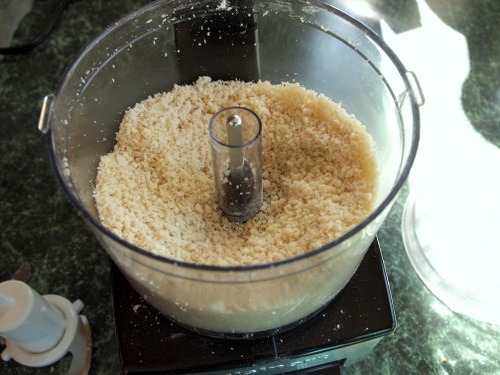
I made mini tarts and blind baked them filled with pie weights. If you don’t have pie weights you can use dried beans but be sure not to skip this step altogether. If you try to bake the tart crust without weights the dough will bubble up in the middle leaving no room for the delicious lemon curd. Believe me, I’m telling you this from experience.
Here they are fresh out of the oven. Almost good enough to eat even with out the lemon curd.
And here they are filled with sweet and tangy lemon curd and topped with fresh whipped cream.
Honey Sweetened Meyer Lemon Tarts
Adapted from Cookie + Kate and Taste of Home
Makes (3) 4 1/2 inch tarts or (1) 9 inch tart
Lemon Curd:
4 tablespoons unsalted butter, cut into small pieces
1/3 cup honey
4 egg yolks
2 eggs
2/3 cup Meyer lemon juice (from 7-8 lemons)
1 tablespoon Meyer lemon zest
Almond Crust:
1 cup white unbleached flour
1/2 cup slivered almonds
1/4 cup sugar
6 tablespoons unsalted butter, room temperature
1/2 teaspoon almond extract
1/4 teaspoon salt
2-3 tablespoons ice water
For the topping:
Whipped cream
Meyer lemon shavings
1. Make the crust: Pulse the almonds in a food processor until finely ground. Add the flour, sugar, butter, almond extract and salt and pulse until combined. Slowly add the ice water 1 tablespoon at a time until a soft dough forms. Using your hands form the dough into a ball, place it between two pieces of parchment or wax paper and flatten to a disk shape. Wrap the edges of the paper tightly around the dough and refrigerate for 1 hour. (Alternate directions: Since I only have a small one-cup food processor I used it to ground the almonds and then transferred them to my stand mixer where I finished the dough. I followed the same process; mixing all the ingredients together and then adding the ice water a little at a time until a dough formed. It worked perfectly, the only drawback was more dishes to wash.)
2. Preheat the oven to 350ºF. Remove the dough from the refrigerator and unwrap the sides of the dough, but leave it between the sheets of paper for rolling. This prevents the dough from sticking to the surface and your rolling pin without using flour. Start by pressing the dough with the rolling pin from the middle to each end, turning the dough 180 degrees and repeating. Continue rolling the dough into a circle about an 1/8th inch thick. If making small tarts, cut out circles slightly larger than the pans you are using (my tartlets pans are 4 1/2 inches wide so I cut out 5” circles) and press the dough into the pans. If you are making one large tart, place the entire dough circle over the pan, press it into the bottom and corners and trim the edges.
3. Cut pieces of parchment paper or aluminum foil large enough to cover the bottom of the crust and extend out a bit over the edges of the pan. Place the paper or foil over the crust (s) and fill with pie weights or dry beans. Bake for 20 minutes, remove the weights and paper or foil and continue baking until the edges turn a light golden color, about 5 –7 more minutes. Remove from the oven and let the crust cool.
4. Make the Lemon Curd: In the bowl of a stand mixer, or in a medium size bowl if using a hand mixer, mix the butter and honey until creamy, about 3-5 minutes. Slowly add the egg yolks and whole eggs; beat until combined. Add the lemon juice and mix briefly. Don’t worry if the batter looks lumpy, it will smooth out on the stove top.
5. Transfer the mixture to a medium size non-reactive pot (not aluminum or unlined copper) and cook over medium-low heat stirring constantly. The mixture will begin to thicken after about 5 minutes. Continue stirring until it it thick and jelly-like. Test for doneness by running your finger over the back of a wooden spoon coated in the curd- if it leaves a clear path it is ready. For me it took about 7 minutes for the curd to finish. Remove from the heat and stir in the lemon zest.
6. Pour the lemon curd into the cooled tarts shells.* Before serving top with whipped cream and a sprinkle of shaved lemon peel if desired.
*If you are not using the lemon curd right away transfer it to a bowl and place a piece of plastic wrap over the top letting come in contact with the curd. Gently press the plastic into the top of the curd until it is completely covered. This will prevent air from forming a crust on top of the curd. Refrigerate until ready to use.
Mar
Peppermint Tea Dark Chocolate Brownies

Hmmm…tea or brownies? Tea and brownies? How about tea in brownies! If you love tea and you LOVE brownies (who doesn’t love brownies? ) this recipe is for you. Dense fudgy,dark chocolate laden brownies spiked with an earthy mint flavor reminiscent of your favorite cup of tea. It’s a chocolate and mint lovers dream. This special brownie was inspired by a recipe that I pulled out of a magazine years ago, filed away for future use and promptly forgot about. For ten years. Yup, the date at the bottom of the page says August/September 2002. Wow, I guess I should go through my recipe file more often. The funny part is that when I saved the recipe I didn’t know it had tea in it. I thought it was just your normal mint brownie made with peppermint extract. The main reason I saved it all these years was because of the pretty marbled white chocolate glaze that covered the brownie. It wasn’t until I read through the ingredients and spotted the tea that I realized what a special recipe this was. Despite my initial excitement, in the end I used the tea portion of the recipe and a modified version of the glaze, but not much else. The reason? It called for 2 1/2 sticks of butter and 2 cups of sugar!!! Granted, the recipe made a 9 x 13-inch pan of brownies which is pretty big, but even cut in half this recipe has more butter and sugar than any brownie would ever need. I have a brownie recipe from Cooking Light that I often use as a base for any brownie that I create. It’s thick and fudge-like with lots of chocolate flavor but only 5 tablespoons of butter and a mere 3/4 cup of sugar. Lots of indulgent flavor but no so many indulgent ingredients.
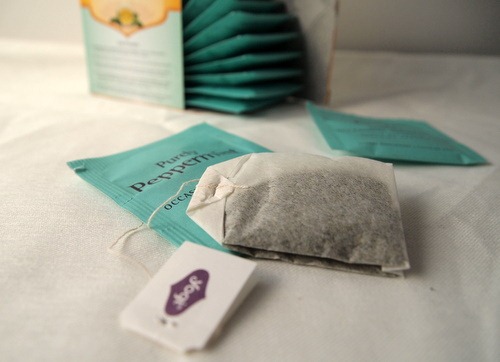
The tea I used was Yogi Purely Peppermint, but any herbal peppermint tea will do. I like the Yogi brand because they have a whole line of teas for specific aliments like Bedtime tea, Calming tea and my favorite Throat Comfort. I swear this is the best remedy for a sore throat out there. Beside their awesome teas, the other thing I love about the Yogi brand is that each tea bag comes with an inspirational message. And who couldn’t use a little inspiration with their tea…or their brownies?
The recipe instructions said to grind the sugar and tea leaves together in a food processor. Honestly, I’m not totally convinced that this step is necessary. My tea leaves were pretty well ground to begin with and I’m pretty sure that simply stirring the sugar and tea together would have produced the same result. But I did it anyway. I did it because when trying something new I‘m often struck with a debilitating fear that if I don’t follow the directions exactly I will be doomed to imminent failure. Let’s just say that in this case I took one for the team. I ground that sugar and tea so that you wouldn’t have to. Or go ahead and grind…who am I to tell you to break the rules? 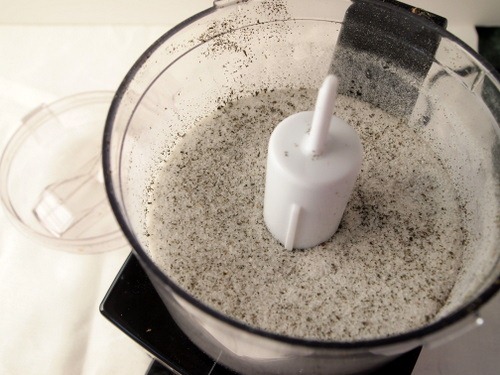
Grinding or no grinding, the end result is a thick, fudge-like batter laced with a refreshing minty aroma. 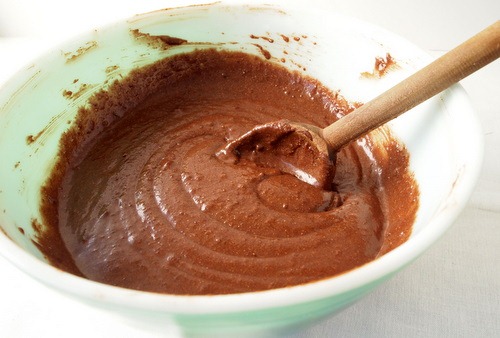
I had mine with what else… a mug of hot steaming tea.
Peppermint Tea Dark Chocolate Brownies
inspired by Cooking Light and Fine Cooking
Makes 16 small or 12 medium brownies
1/2 cup whole wheat pastry flour
1/2 cup white flour
1/2 cup unsweetened cocoa
1/4 teaspoon salt
1 teaspoon peppermint tea (from 1 teabag)
3/4 cup granulated sugar
5 tablespoons unsalted butter
2 ounces dark chocolate
1 teaspoon peppermint extract
3/4 cup milk
1 egg
2 egg yolks
2 ounces dark chocolate
1 tablespoon butter
1 ounce white chocolate
~1 tablespoon milk
green food coloring (optional)
1. Preheat the oven to 350ºF. Line an 8-inch square baking dish with parchment paper. Cut the paper long so it overhangs the edge of the dish on two sides. This will make it easy to remove the brownies before frosting.
2. In a medium bowl sift together the flours, cocoa and salt. In a food processor grind together the sugar and tea, add to the flour mixture. (This step can be skipped if you don’t have a food processor, just add the sugar and tea to the flour mixture and combine).
3. Place 2 ounces of dark chocolate and 5 tablespoons of butter cut into pieces in a small bowl. Microwave on high for about one minute in 20 second intervals. Stir between each interval. When the chocolate and butter are melted stir in the peppermint extract. Set aside to cool slightly.
4. In a small bowl whisk together the milk, egg and egg yolks. Add to the flour mixture and stir with a wooden spoon until completely incorporated. Fold in the chocolate mixture until just combined. The batter will be thick.
5. Pour into the prepared pan and tap on the counter to level. Bake for 25-30 minutes or until a wooden skewer inserted comes out clean. Place on a wire rack to cool. After about ten minutes pull the parchment edges and lift the brownies out of the pan. Let cool completely before frosting (about 1 hour).
6. When the brownies are cool melt the remaining 2 ounces of dark chocolate with 1 tablespoon of butter using the same method of 20 second intervals for about 1 minute total. Set aside and melt the white chocolate with a scant tablespoon of milk. Add more milk if needed until the white chocolate is the right consistency to drizzle over the brownies in a thin line. Add the food coloring one drop at a time until the desired green color is achieved. When both chocolates are melted pour the dark chocolate over the brownies and spread smooth. Drizzle the white chocolate over top in straight lines and drag a toothpick through the chocolate in alternating directions. Put the brownies in the fridge to cool for at least 2o minutes. Remove and cut into 12 or 16 pieces.
Feb
Chocolate Pavlova with Blood Orange Cream

I made you a dessert. A magnificent dessert. A dessert with chocolate and cream and tropical fruit. A dessert that will make your heart fill with joy and your mouth cry out for more. A dessert that is impressive to behold yet surprisingly simple to prepare. A dessert that is truly worthy of a holiday meant for love. ♥
You’re welcome.
If you’ve never had the pleasure of enjoying a Pavlova before, you’re in for a real treat. This meringue based dessert boasts an airy crisp crust and a chewy, almost marshmallow like center. It’s topped with whipped cream- I infused mine with a bit of fresh squeezed blood orange juice- and piled high with fresh fruits and berries. Pavlova is the perfect dessert to make for the one you love…or to ask the one you love to make for you. It does take a bit of time to prepare because the meringue needs to cook at a low temperature for about an hour and then cool slowly for another hour. But the hands on time is pretty minimal. And I promise…it is totally worth it.
Whipped egg whites and cocoa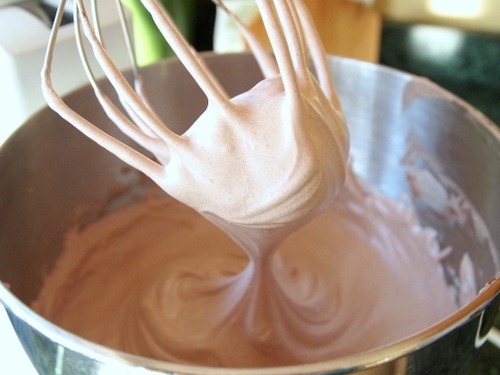
Meet fresh fruit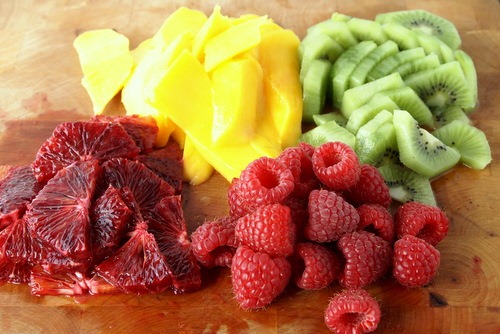
All together now
Chocolate Pavlova with Blood Orange Whipped Cream
barley adapted from Fine Cooking
4 large egg whites, room temperature
1/8 teaspoon cream of tartar
3/4 cup plus 2 tablespoons granulated sugar
1 tablespoon red wine vinegar
1 1/2 teaspoons cornstarch
1/4 cup unsweetened cocoa, sifted
1 cup heavy cream
2 tablespoons blood orange juice, from 1 orange
2 cups fresh fruit and berries ( I used 2 kiwis, 1 mango, 1 blood orange, and about 1/2 a cup of raspberries)
1. Preheat the oven to 350ºF. Cut a piece of parchment paper into a 9 inch circle and place on a baking sheet.
2. In the bowl of an electric stand mixer, or using a large bowl and an electric hand mixer, whip the egg whites and cream of tarter for about 30 seconds on medium speed until foamy. Slowly add 3/4 cup of sugar, cornstarch and vinegar. Raise the speed to medium high and whip for another 3 to 5 minutes or until the whites are glossy and hold stiff peaks when the beater is raised out of the bowl. With the mixer on low add the sifted cocoa and mix until almost combined. Turn off the mixer, scrape the sides of the bowl with a rubber spatula and finish mixing in the cocoa by hand until it is completely incorporated.
3. Slide the meringue out of the bowl and onto the parchment circle. Spread it out so it fills the entire circle and smooth the top a bit. Don’t worry about making it perfectly level, the ridges and bumps will give the finished product character.
4. Bake for 10 minutes and then reduce the heat to 300ºF. Bake for another 45 to 50 minutes until it cracks around the edges and puffs in the middle. Turn off the oven and open the door a crack. Leave the meringue in the oven to cool for 45-60 minutes. The slower it cools the less it will collapse in the middle. You can make the meringue the day before you plan on serving it and leave it in the oven to cool overnight.
5. Right before serving beat the heavy cream, blood orange juice, and remaining two tablespoons of sugar in a chilled bowl until soft peaks form. Mound the whipped cream on the meringue and spread it almost to the edge. Top with fresh fruit and serve immediately.
Subscribe by e-mail
Recent Posts
Tags
Archives
Tasty Reads

